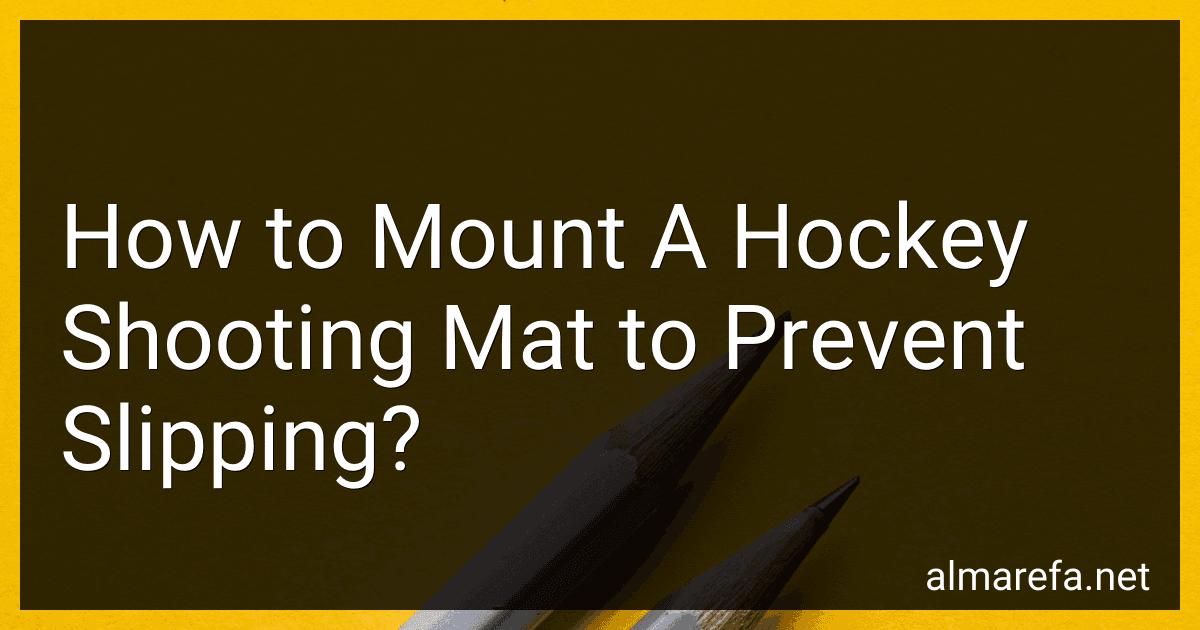
Best Hockey Shooting Mats to Buy in November 2025

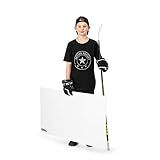
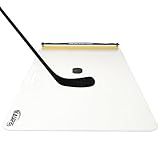
TronX Hockey Large 30" by 60" Extreme Pro Shooting Pad - Quality Sports Training Aid for Shooting, Passing & Stickhandling - Better Hockey - Synthetic Ice Mat Simulates Real Ice Feel
-
EXPERIENCE SLICK ICE FEEL AT HOME WITH OUR VERSATILE SHOOTING PADS!
-
PROTECT YOUR STICKS FROM DAMAGE ON ROUGH SURFACES WITH OUR MAT!
-
ENHANCE STICKHANDLING, SHOOTING, AND PASSING SKILLS EASILY OUTDOORS!


ACE HOCKEY Shooting Pad 24” x 48” - Shoot Like on Real Ice - Practice Shooting, Stickhandling, Passing Skills on 8 sqft - Convenient Off-Ice Training - Easy to Carry - Synthetic Ice Mat
- EXPERIENCE TRUE ICE FEEL WITH ACE HOCKEY'S SMOOTH SHOOTING PAD!
- 24X48 SURFACE PERFECT FOR PRACTICING ALL HOCKEY SKILLS & DRILLS.
- LIGHTWEIGHT DESIGN LETS YOU PRACTICE ANYWHERE, ANYTIME!
ACE HOCKEY Shooting Pad 30” x 60” - Shoot Like on Real Ice - Practice Shooting, Stickhandling, Passing Skills on 12.5 sqft - Convenient Off-Ice Training - Easy to Carry - Synthetic Ice Mat
-
EXPERIENCE REAL ICE FEEL AT HOME FOR TRUE SKILL DEVELOPMENT.
-
SPACIOUS 30X60 SURFACE PERFECT FOR VARIOUS DRILLS & EXERCISES.
-
LIGHTWEIGHT & PORTABLE FOR PRACTICE ANYTIME, ANYWHERE!
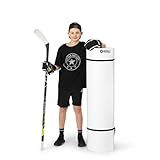
Better Hockey Extreme Pro Shooting Pad - Size 28 x 57 3/16 inches - Simulates The Feel of Real Ice - Easy to Carry - Great for Shooting, Passing and Stickhandling - Weather Proof Coating
- PREMIUM QUALITY SHOOTING PAD SIMULATES REAL ICE FEEL, BEST VALUE!
- USE INDOORS OR OUTDOORS YEAR-ROUND, LIGHTWEIGHT, EASY TO CARRY.
- TRUSTED BY NHL PROS, IMPROVE SKILLS WHILE EXTENDING STICK LIFE!
Better Hockey Hockey Shooting Pad – 24” x 48” Synthetic Ice Board for Stickhandling, Passing & Shooting Extreme – Off-Ice Training Mat
- BEST VALUE & QUALITY: PREMIUM PAD SIMULATES REAL ICE FEEL!
- PRACTICE ANYWHERE: UV-PROTECTED, WEATHERPROOF, PORTABLE DESIGN!
- TRUSTED BY PROS: USED BY 100+ NHL PLAYERS FOR SUMMER TRAINING!
Snipers Edge Hockey - Hockey Shooting Pad - Small 24" by 48" - Simulates Real Ice, Heavy Duty, Weather Proof Coating, Portable and Convenient
- TRAIN ANYWHERE: IDEAL FOR GARAGES, BASEMENTS, OR DRIVEWAYS!
- DURABLE DESIGN: ENJOY SMOOTH GLIDES WITHOUT MESSY SPRAYS!
- PORTABLE & COMPACT: STORE EASILY; TRAIN ANYWHERE WITH EASE!
Better Hockey Portable Roll-Up Shooting Pad - Feels Like Real Ice, for Passing Stickhandling and One Timers, Large 4 Foot x 8.5 Foot Size
- ULTIMATE TRAINING SURFACE FOR HOME & STREET PRACTICE
- REAL ICE FEEL WITH SMOOTH SLIDING FOR HEAVY SLAP SHOTS
- WEATHER-PROOF & PORTABLE FOR YEAR-ROUND TRAINING ANYWHERE
TronX Hockey Shooting Pad - Size 24 inches x 48 inches - Simulates The Feel of Real Ice - Easy to Carry - Great for Shooting, Passing and Stickhandling - Weather Proof Coating
- PORTABLE 24 X 48 PAD WITH A USER-FRIENDLY CARRYING HANDLE.
- DURABLE SURFACE PROTECTS STICKS; PRACTICE SHOTS ANYWHERE, ANY TIME!
- IDEAL FOR ALL SKILL LEVELS; ENHANCES SHOOTING AND STICKHANDLING SKILLS.
kasifei – Hockey Shooting Pad with Rebounder, 48'' x 24'' Professional Hockey Training Equipment for Shooting, Synthetic Ice for Hockey Passing and Stickhandling
- IMPROVE SKILLS WITH A 48 X 24 VERSATILE SYNTHETIC ICE SURFACE!
- DURABLE SHOOTING PAD ENSURES SMOOTH PUCK SLIDING FOR DRILLS.
- INTEGRATED HOCKEY PASSER OFFERS ENDLESS SHOOTING REPETITIONS!
When it comes to mounting a hockey shooting mat to prevent slipping, there are a few key steps you can follow.
Firstly, ensure that the surface where you plan to mount the shooting mat is clean and free from any dust or debris. This will help the mat adhere better and minimize the chances of slipping.
Next, consider using a high-quality adhesive or double-sided tape designed for heavy-duty applications. These adhesives are often designed to bond well with various surfaces and provide a secure hold. Apply the adhesive or tape in a grid pattern across the back of the mat, ensuring good coverage while leaving some space between the strips.
Before pressing the mat onto the surface, it can be helpful to lay it out in the desired position to make sure it aligns properly. Once you're confident about the placement, firmly press the mat onto the surface, using even pressure to ensure proper adhesion. Make sure to press along the entire surface of the mat, paying particular attention to the edges.
If you want to further secure the shooting mat, consider using screws or staples in addition to the adhesive. Screw or staple the mat at regular intervals, ensuring that they do not interfere with the smooth surface required for shooting pucks.
Allow the adhesive or tape to cure and bond according to the manufacturer's instructions. This curing time may vary depending on the product, so be sure to read and follow the recommended guidelines.
Finally, test out the shooting mat by giving it a few firm pushes to ensure that it is securely mounted and does not slip. If you notice any areas where the mat is not adequately adhered, you may need to reinforce them with additional adhesive or consider other methods to prevent slipping.
How to align multiple hockey shooting mats for an extended surface?
To align multiple hockey shooting mats for an extended surface, follow these steps:
- Measure the area: Determine the dimensions of the extended surface where you want to align the mats. This will help you determine the number of mats needed.
- Choose the mats: Select high-quality hockey shooting mats that are durable and suitable for your playing needs. Ensure that the mats fit together properly for a seamless surface.
- Clean the surface: Before laying down the mats, make sure the area is clean and free from any debris or obstacles that could affect the alignment.
- Lay the first mat: Start by laying down the first shooting mat at one end of the extended surface. Make sure it is positioned straight and aligned with the desired markings or targets.
- Secure the mat: Anchor the first mat in place using fasteners or adhesive strips that are suitable for your specific flooring type. This will help prevent the mat from shifting during gameplay.
- Repeat the process: Align the subsequent mats to the first one, ensuring that the edges and corners match up seamlessly. Use fasteners or adhesive strips to secure each mat in place.
- Test the alignment: Once all the mats are laid down and secured, test the alignment by shooting pucks or balls across the entire surface. Check for any gaps or unevenness between the mats.
- Make adjustments: If you notice any gaps or unevenness, adjust the mats accordingly until the surface is entirely aligned and smooth.
- Secure the mats together: To enhance stability and prevent shifting during intense gameplay, use additional fasteners or adhesive strips to join the edges of each mat securely.
- Maintain the mats: Regularly clean and maintain the mats to prolong their lifespan and ensure optimal performance. Follow the manufacturer's instructions for cleaning and care.
By following these steps, you can align multiple hockey shooting mats to create an extended surface suitable for practice or gameplay.
How to prepare a surface before mounting a hockey shooting mat?
To prepare a surface before mounting a hockey shooting mat, follow these steps:
- Clear the area: Remove any furniture, debris, or obstacles from the surface where the shooting mat will be placed.
- Clean the surface: Use a broom or a vacuum cleaner to remove any dust, dirt, or loose particles from the surface. This will ensure a clean and smooth area for mounting the shooting mat.
- Smooth out uneven surfaces: If the surface has any bumps, holes, or uneven areas, you may need to fill them or address the issue before mounting the shooting mat. For small holes or cracks, you can use a filler or putty to level them out. In the case of larger imperfections, it might be necessary to consult a professional to fix the surface.
- Level the surface: It is important to ensure that the surface is level and even before mounting the shooting mat. If the surface is uneven, you can use a leveling compound to create a smooth and level playing area.
- Allow for proper ventilation: If the shooting mat will be installed indoors, ensure there is proper ventilation to prevent condensation or moisture buildup. This will help maintain the longevity of the shooting mat.
- Secure the edges: Depending on the type of shooting mat, you may need to secure the edges to prevent any movement during play. This can be done using adhesive tape, Velcro, or any other appropriate fastening method recommended by the manufacturer.
- Test the surface: Before using the shooting mat, test the surface by moving around on it and puck handling to ensure it is secure and does not move or slide. Make necessary adjustments if needed.
By following these steps, you can properly prepare the surface and mount a hockey shooting mat for optimal use.
How to mount a hockey shooting mat without using adhesive?
Mounting a hockey shooting mat without using adhesive can be achieved by following these steps:
- Lay the shooting mat on the desired surface to confirm its position and fit.
- Use measuring tape or a tape measure to accurately mark the corners and sides of the shooting mat on the surface.
- Purchase double-sided carpet tape or heavy-duty Velcro strips. These materials will provide sufficient grip to secure the shooting mat without using adhesive.
- Cut the double-sided carpet tape or Velcro strips into small, manageable lengths or squares.
- Apply the double-sided carpet tape or Velcro strips on the marked corners and sides of the shooting mat, making sure they are evenly distributed for optimal support.
- Press firmly on each piece of tape or Velcro strip to ensure a secure bond between the shooting mat and the surface underneath.
- Once all the tape or Velcro strips are applied, carefully place the shooting mat on top, aligning it with the marked corners and sides.
- Apply pressure evenly across the entire surface of the shooting mat, smoothing out any wrinkles or bubbles that may have formed.
- Test the mount by stepping on different areas of the shooting mat to ensure it is securely attached and does not move or shift excessively.
By following these steps and using double-sided carpet tape or heavy-duty Velcro strips, you can mount a hockey shooting mat without the need for adhesive.
How to mount a hockey shooting mat on a synthetic ice surface?
Mounting a hockey shooting mat on a synthetic ice surface can be done following these steps:
- Clean the surface: Ensure that the synthetic ice surface is clean and free from any debris or dirt. Use a broom or vacuum cleaner to remove any loose particles.
- Measure and cut the shooting mat: Measure the desired length and width of the shooting mat using a measuring tape. Mark the measurements on the shooting mat and use a utility knife or scissors to cut it to the desired size.
- Position the shooting mat: Position the shooting mat on the synthetic ice surface, aligning the edges as necessary. Ensure that the shooting mat is straight and centered on the area where you want it to be mounted.
- Secure the shooting mat: Use adhesive strips or double-sided carpet tape to secure the shooting mat to the synthetic ice surface. Apply the adhesive strips or tape along the edges and corners of the shooting mat, as well as in the middle for added stability.
- Smooth out any wrinkles or bubbles: Once the shooting mat is secured, carefully smooth out any wrinkles, bubbles, or creases that may have formed. Apply pressure with your hands or a roller to ensure a flat and even surface.
- Trim any excess material: If the shooting mat extends beyond the desired area, use a utility knife or scissors to trim off the excess material. Make sure to follow the manufacturer's instructions for proper trimming technique.
- Test and adjust: After mounting the shooting mat, test it by shooting pucks or practicing your hockey skills. If you notice any areas that need adjustment or additional securing, do so accordingly.
Note: It is important to refer to the specific instructions provided by the manufacturer of the shooting mat and synthetic ice surface for any unique mounting requirements or precautions.
How to mount a hockey shooting mat on grass?
To mount a hockey shooting mat on grass, you will need the following materials and tools:
Materials:
- Hockey shooting mat
- Ground stakes or landscape fabric pins
- String or zip ties
- Scissors or wire cutters
Tools:
- Hammer or rubber mallet
- Tape measure
Here are the steps to mount a hockey shooting mat on grass:
- Choose a suitable location: Find a flat area of grass where you have enough space to set up the shooting mat. Make sure the ground is even and free from any obstacles or obstructions.
- Measure and prepare the shooting mat: Measure the dimensions of the shooting mat to ensure it fits properly in the desired location. If needed, trim any excess edges of the shooting mat using scissors or wire cutters.
- Secure the shooting mat corners: Place the shooting mat on the grass and align it properly. Starting from one corner, use ground stakes or landscape fabric pins to secure each corner of the shooting mat to the ground. Hammer the stakes or pins into the ground to ensure they are firmly anchored.
- Secure the shooting mat edges: Once the corners are secured, use additional stakes or pins to secure the edges of the shooting mat. Place the stakes or pins along the edges, approximately every 2-3 feet, and hammer them into the ground. This will help prevent the shooting mat from shifting or moving during use.
- Optional: Use string or zip ties: If you want extra stability, you can use string or zip ties to further anchor the shooting mat to the ground. Cut small holes along the edges of the shooting mat and loop the string or zip ties through the holes. Push the ends of the ties into the ground around the shooting mat to secure it tightly.
- Test and adjust: Once everything is secured, walk on the shooting mat to test its stability. If you notice any movement or shifting, reposition and secure the mat as needed.
By following these steps, you should be able to mount a hockey shooting mat on grass effectively.