Best Hockey Shooting Tarps to Buy in November 2025
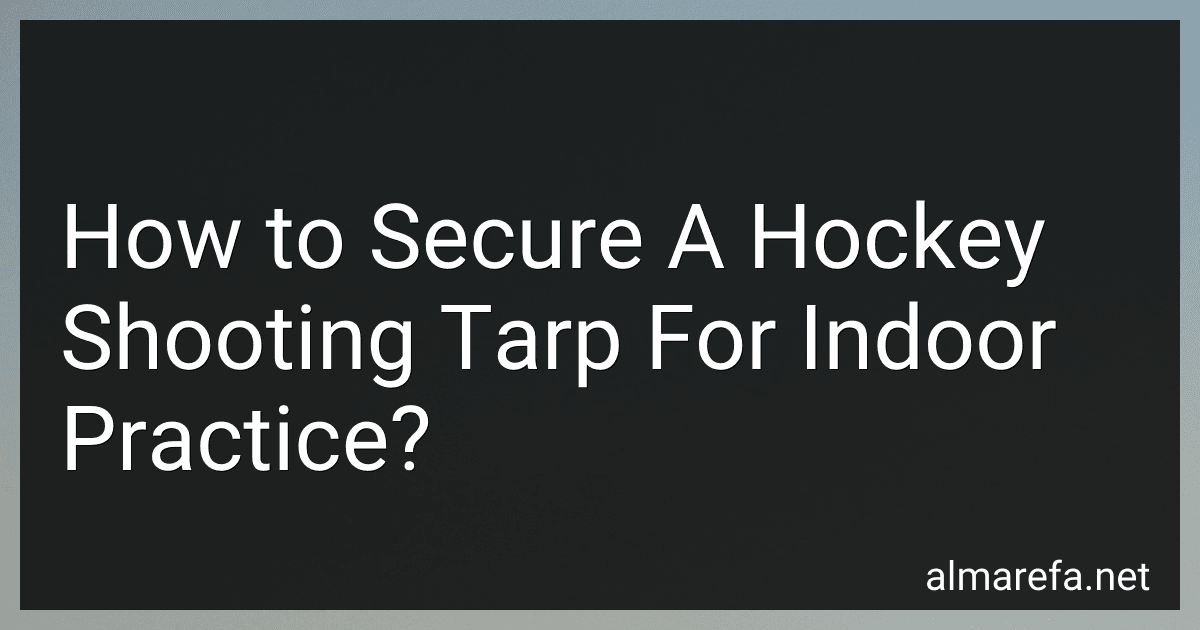
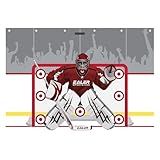
Kasifei – 7' x 10' Heavy Duty Hockey Shooting Tarp – Built-in Shooter Tutor – Great Hockey Net Replacement – Training Equipment for All Skill Levels - Garage & Wall Protection
- HEAVY-DUTY VINYL WITHSTANDS INTENSE HOCKEY TRAINING IMPACTS.
- 7 SCORING ZONES ENHANCE SHOT ACCURACY AND POWER.
- QUICK SETUP IN 20 MINUTES PROTECTS YOUR GARAGE/WALLS.


MABOZOO Hockey Shooting Tarp, 16ft x 8 ft Hockey Training Equipment for Shooting Foldable Target Practice Protect Wall or Garage Door
-
EXTRA-LARGE SIZE: PROTECTS WALLS, ABSORBS IMPACT, AND REDUCES NOISE.
-
DURABLE DESIGN: HEAVY-DUTY, UV-PROOF MATERIAL WITHSTANDS HOCKEY TRAINING.
-
TRAINING MADE EASY: 5 TARGET HOLES ENHANCE ACCURACY AND SKILLS.
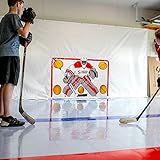
Snipers Edge Hockey Shooting Tarp – 7 by 16 ft Tarp Made of Heavy Duty Vinyl, Training Backstop - Develop a Stronger and More Accurate Shot, Indoor/Outdoor, Protects Walls & Windows, 5-Target Design
-
PRACTICE ACCURACY WITH 5-POCKET LAYOUT-IMPROVE ALL SHOT SKILLS!
-
DURABLE UV-COATED VINYL: WITHSTANDS THOUSANDS OF SHOTS, INDOOR/OUTDOOR.
-
CHOOSE SIZE FOR ANY SPACE; PERFECT FOR RINKS, GARAGES, OR BACKYARDS.
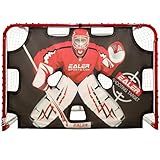
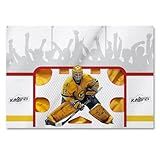
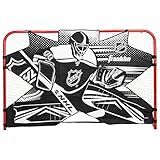
EALER HTST50 72'' x 48'' Hockey Goalie Shooting Target - Hockey Goal Practice Targets with 11 Target Holes - Premium Tear-Proof Heavy-Duty Fabric
- FITS ALL REGULATION 6' X 4' GOALS-IDEAL FOR ALL SKILL LEVELS!
- HEAVY-DUTY, WEATHERPROOF NYLON ENSURES YEAR-ROUND DURABILITY.
- 11 TARGET HOLES FOR PRECISION TRAINING AND IMPROVED PUCK CONTROL!
kasifei – 8' x 16' Heavy Duty Hockey Shooting Tarp – Built-in Shooter Tutor – Great Hockey Net Replacement – Training Equipment for All Skill Levels - Garage & Wall Protection
-
DURABLE DESIGN: HEAVY-DUTY VINYL WITHSTANDS INTENSE TRAINING IMPACTS.
-
PRECISION TRAINING: 7 SCORING ZONES ENSURE ACCURATE AND POWERFUL SHOTS.
-
QUICK SETUP: INSTALLS IN JUST 20 MINUTES; PERFECT FOR ANY SURFACE!
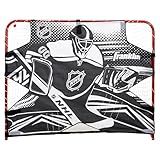
EALER HTST80 7FT/8FT x 16FT in 1 - Heavy Duty Hockey Shooting Tarp - Goal Practice Target -Built-in Shooter Tutor – Great Hockey Net Replacement - Garage & Wall Protection
-
HEAVY-DUTY 18 OZ. VINYL WITHSTANDS IMPACTS FOR INDOOR/OUTDOOR USE.
-
SEVEN REINFORCED TARGET HOLES ENHANCE ACCURACY DURING TRAINING SESSIONS.
-
EASY SETUP AND STORAGE WITH BUNGEES; FOCUS ON PRACTICING EFFICIENTLY!
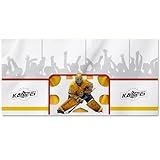
Franklin Sports NHL Hockey Shooting Target - 54" x 44"
- PERFECT YOUR SHOT ACCURACY AND OUTSMART GOALIES WITH CONFIDENCE!
- QUICK INSTALLATION ON ANY 54 X 44 GOAL-START PRACTICING FAST!
- TOUGH, WEATHERPROOF DESIGN ENSURES LONG-LASTING PRACTICE SESSIONS.
HIRALIY 20 Mil Heavy Duty Waterproof Tarp, 7x12ft Black Tarpaulin with Reinforced Webbing Loops, Multipurpose Oxford Canvas Tarp for Firewood, Roof, Camping, Pool
- ULTIMATE PROTECTION: HEAVY-DUTY TARP SHIELDS FROM RAIN, SNOW, AND SUN.
- DURABLE & TEARPROOF: MADE WITH 420D OXFORD FABRIC FOR LONG-LASTING USE.
- VERSATILE USE: PERFECT FOR CAMPING, COVERING GOODS, AND OUTDOOR STORAGE.
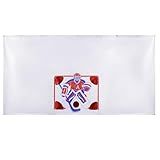
Ealer HTST70 7‘x10’ Hockey Goalie Shooting Target - Ice & Street Hockey Goal Practice- Premium Tear-Proof Heavy-Duty Fabric
- DURABLE WEATHER-RESISTANT DESIGN FOR ALL-SEASON PRACTICE.
- CLEAR TARGET VISIBILITY TO IMPROVE SHOT ACCURACY AND POWER.
- QUICK SETUP WITH COMPACT STORAGE FOR CONVENIENT TRAINING.
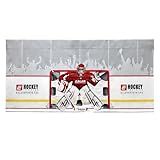
Franklin Sports NHL SX Pro 72-Inch Championship Shooting Target, 72-by-48-Inch
- IMPROVE SHOT ACCURACY WITH 72 TARGET FOR ELITE GOAL-SCORING SKILLS!
- QUICK SETUP WITH SELF-STICK STRAPS FOR EASY ATTACHMENT TO GOAL POSTS.
- DURABLE, WATERPROOF FABRIC WITHSTANDS HARDEST SHOTS AND ELEMENTS!
To secure a hockey shooting tarp for indoor practice, you will need a few key steps. First, find a suitable location in your indoor space where you can safely hang the tarp. It should be flat and have enough space for you to shoot comfortably.
Next, ensure that you have the necessary equipment and materials. This includes a sturdy tarp specifically designed for hockey shooting practice, such as a heavy-duty polyester tarp with reinforced edges. You will also need bungee cords or zip ties, a ladder, and a few nails or hooks.
Start by climbing the ladder and attaching the tarp's top corners to the wall or ceiling using bungee cords. Make sure to stretch the tarp tight for better rebound effect during shooting. Alternatively, you can use zip ties to secure the corners tightly.
After the top corners are secured, progressively move down the sides of the tarp, attaching additional bungee cords or zip ties. Space them evenly to keep the tarp taut and eliminate any sagging.
Ensure that the tarp is even vertically by using a level or assessing it visually. Make any necessary adjustments to tighten it up further.
For added stability, you can also secure the bottom corners of the tarp using nails or hooks. Hammer them into the wall or floor to keep the tarp from shifting during practice sessions.
Once the tarp is securely fastened, ensure that the shooting area is clear and safe. Remove any obstacles or fragile items that may get damaged while shooting pucks at the tarp.
Finally, take a step back and assess the setup to ensure that the tarp is properly secured and positioned for effective hockey shooting practice. Make any necessary tweaks or adjustments, if required.
Remember to always exercise caution and observe safety measures while hanging and using the hockey shooting tarp. Regularly inspect the setup to ensure that it remains secure and stable.
How to adjust the tension of a hockey shooting tarp?
Adjusting the tension of a hockey shooting tarp is essential to get the right bounce-back and rebound effect when practicing your shots. Here's a step-by-step guide on how to do it:
- Start by attaching the tarp securely to the frame or structure. Check that it is evenly and tightly fastened, ensuring no loose areas or sagging.
- Begin adjusting the tension by identifying the areas where the tarp hangs loose or lacks proper tightness. These areas are usually on the sides or corners.
- Gradually tighten the tarp using the fastening mechanism provided with your shooting tarp. This can be done by pulling the fastening straps or cords, or by using hooks, clips, or bungee cords if supplied.
- Work your way around the tarp, tightening each loose area little by little until you achieve the desired tension. Remember not to overtighten, as this may cause stress on the tarp material or structure.
- After tightening any loose spots, step back and visually inspect the tarp to ensure it appears evenly tensioned from all angles. Adjust as necessary.
- To test the tension, take shots at various parts of the tarp while observing the rebound and bounce-back. If you find that the shots are not bouncing back with the desired force, or if the tarp is not providing enough resistance, you may need to further adjust the tension.
- Repeat the tightening process again, focusing on the areas where shots don't rebound as expected. Make small adjustments until you achieve the desired performance.
Remember, the key is to fine-tune the tension according to your personal preferences and practicing needs. It may take some trial and error to find the perfect tension that suits your style of shooting.
What is the recommended height for installing a hockey shooting tarp?
The recommended height for installing a hockey shooting tarp is typically around 7 to 8 feet above the ground. This allows enough space for players to practice their shots without the risk of hitting the tarp or the structure it is attached to. However, the specific height may vary depending on individual preferences and the available space.
How to fold a hockey shooting tarp for storage?
To fold a hockey shooting tarp for storage, follow these steps:
- Start by removing any clips, bungees, or straps that may be attached to the tarp.
- Lay the tarp flat on the ground, ensuring it is free from any debris or wet spots.
- Begin at one end and fold the tarp in half lengthwise, bringing the top edge down to meet the bottom edge. This will create a long rectangle.
- Next, fold the tarp in half widthwise, bringing one side over to meet the other. Now you should have a smaller rectangle.
- Continue folding the tarp in half widthwise until you have a long, narrow strip. Make sure the folds are neat and even.
- Finally, roll up the tarp tightly, starting from one end and rolling towards the other. This will create a compact roll that can be easily stored.
- If possible, secure the rolled tarp with bungee cords or straps to prevent it from unrolling during storage.
By following these steps, you should be able to fold your hockey shooting tarp efficiently and store it in a compact manner until its next use.
How to position a hockey shooting tarp for optimal practice sessions?
To position a hockey shooting tarp for optimal practice sessions, follow these steps:
- Choose an appropriate location: Find a suitable and spacious area to set up your shooting tarp. Ideally, it should be large enough to accommodate your shooting angles and have enough room behind the tarp to prevent damage or obstruction from missed shots.
- Secure the tarp: Ensure the tarp is securely anchored or fastened to prevent it from moving or falling during practice. You can use bungee cords, ropes, clips, or heavy-duty fasteners to secure the tarp to surrounding structures like walls, fences, or a frame.
- Distance from the shooter: The shooting tarp should be positioned at a proper distance from the shooter to simulate game situations. This distance will vary depending on the player's skill level and the type of shot they are practicing. Typically, a regulation distance of 20-25 feet (6-7.5 meters) from the shooter is a good starting point.
- Height adjustment: Adjust the height of the shooting tarp based on your desired practice objective. For practicing high shots, raise the tarp to leave space for shots to go above the goalie's shoulders. For low shots, lower the tarp to encourage shots along the ice or between the goalie's legs.
- Shooting angles: Experiment with different shooting angles by adjusting the tarp's position. This will help you work on various areas of scoring, such as top shelf, low corners, or five-hole shots. Consider moving the tarp to different sides or angles after a few practice rounds to train yourself in shooting from different locations.
- Goalie cutouts: Some shooting tarps come with goalie cutouts. If you have one, align the goalie cutouts where you prefer them, considering the areas you want to focus on during practice. You can place the cutouts to simulate common gaps in the goalie's positioning, forcing you to aim for specific target zones.
- Safety precautions: Always ensure the shooting tarp is securely fastened to prevent any accidents or injuries. Be mindful of your surroundings and set up the tarp away from fragile objects or breakable items. Additionally, make sure there is enough space behind the tarp to catch any missed shots safely.
Remember, the positioning of the shooting tarp may vary based on personal preference, skill level, and specific training objectives. Customize the setup to suit your needs and make the most of your practice sessions.
What is the recommended distance between the tarp and shooter during practice?
The recommended distance between the tarp and shooter during practice can vary depending on the specific sport or activity. Generally, for shooting sports like archery or shooting range practice, the distance should be determined by the required shooting distance or target distance for that particular sport. For example, in archery, the distance between the tarp and the shooter can range from a few meters to several dozen meters, depending on the skill level and type of practice being conducted. It is important to ensure enough space to safely shoot and accommodate any potential inaccuracies or rebounds. It is recommended to refer to the specific guidelines or regulations of the sport or consult with an instructor or coach for the appropriate distance in each practice scenario.