
Best CakePHP Installation Tools to Buy in November 2025

Kootek 158 Pcs Cake Decorating Kit with Cake Turntable, 64 Piping Tips, 50+2 Pastry Bags, Frosting Spatulas, Leveler, Scrapers, Fondant Molds, and More Baking Supplies Decorating Tools
- COMPLETE 158PC KIT: ALL ESSENTIAL CAKE DECORATING TOOLS INCLUDED!
- PRO-LEVEL DECORATING: 360° TURNTABLE FOR FLAWLESS DESIGNS.
- EASY-TO-USE GUIDE: E-BOOK & TIPS CHART ASSIST ALL SKILL LEVELS!


Norpro Cupcake Injector/Decorating Icing Set, 9-Piece Set, Stainless Steel, Multicolor
- FILL & DECORATE: 9-PIECE KIT FOR ENDLESS CUPCAKE CREATIVITY!
- VERSATILE USE: IDEAL FOR DESSERTS, EGGS, SCONES, AND MORE!
- USER-FRIENDLY: QUICK TIP CHANGES AND INCLUDES INSTRUCTIONS!
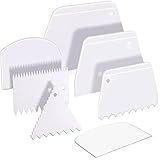
Teenitor Cake Scraper Cake Smoother, 7 Pcs Dough Scraper Bowl Scraper Cake Cutter Cake Spatula Bench Scraper Kitchen Plastic Scraper Tool Cake Decorating Kit
- DURABLE & SAFE: HIGH-GRADE PP PLASTIC ENSURES SAFE, REPEATED USE.
- VERSATILE SET: 7 UNIQUE SCRAPERS FOR ENDLESS DECORATING POSSIBILITIES.
- EASY MAINTENANCE: DISHWASHER SAFE FOR QUICK & HYGIENIC CLEANUP.

2 Pieces 8.7 Inche Stainless Steel Cake Scraper,Double Sided Patterned Edge Stripe Edge Smoother Scraper Cake Decorating,Cake Decorating Comb Cake Scraper (2, 2)
-
DURABLE, FOOD-GRADE STEEL: NON-TOXIC, RUST-RESISTANT, BUILT TO LAST!
-
DUAL-SIDED DESIGN: ACHIEVE SMOOTH FINISHES & STUNNING BUTTERCREAM STRIPES!
-
VERSATILE USE: PERFECT FOR CAKES, CUPCAKES, COOKIES, AND MORE!

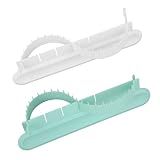
Wshxjzyay 3 Pack Cake Arch Guide Tool, Cake Writing Tools, Convenient for Controlling the Size and Position of the Arc, Convenient for Beginners to Use
-
REUSABLE & EASY TO CLEAN: DURABLE DESIGN FOR REPEATED CAKE DECORATING.
-
CUSTOMIZABLE CURVES: 14 ADJUSTABLE WIDTHS FOR PERFECT DECORATING PRECISION.
-
SYMMETRICAL DESIGNS MADE EASY: INCLUDES TOOLS FOR NEAT, EVEN CAKE EDGES.

Riccle 88 pcs Cake Decorating Kit with Cake Turntable - Includes 50 Disposable + 2 Reusable Piping Bags and Tips Set, 24 Icing Piping Tips, 2 Spatulas, 3 Icing Comb Scraper, Baking Supplies
- ALL-IN-ONE KIT: 24 TIPS, SPATULAS, AND BAGS FOR EFFORTLESS DECORATING!
- DURABLE TURNTABLE: HIGH-QUALITY DESIGN FOR STABILITY & SMOOTH ROTATION!
- FOR ALL SKILL LEVELS: CREATE INTRICATE DESIGNS WITH PROFESSIONAL TOOLS!

Kootek Cake Decorating Kit Baking Supplies Cake Turntable with 2 Frosting Straight Angled Spatula 3 Icing Smoother Scrapers Baking Accessories Tools for Beginners and Pros, White
- COMPLETE KIT: EVERYTHING YOU NEED FOR STUNNING CAKE DESIGNS INCLUDED!
- 360° TURNTABLE ENSURES SMOOTH, PROFESSIONAL-LOOKING CAKE DECORATING.
- USER GUIDE WITH RECIPES AND TUTORIALS FOR BAKERS OF ALL SKILL LEVELS.
2pcs Cake Arch Guide Tool, Green and White Fondant Cake Arc Ruler Decorative Marking Divider Baking Measure Pastry for Home Bakeries Pastry Shops
- CREATE EXQUISITE CAKES EFFORTLESSLY WITH OUR EASY-TO-USE ARCH TOOL.
- PROFESSIONAL-GRADE DESIGNS MADE SIMPLE FOR CHEFS AND DIY ENTHUSIASTS.
- VERSATILE FOR SHOPS, HOMES, AND RESTAURANTS-PERFECT FOR ALL BAKERS!

ScivoKaval Marshmallow Fondant Cake Decorating Hand Tool 12 Pcs 5 Sets Sugarcraft Gumpaste Icing Smoother Rolling Pin Trimmer Cutter Embosser Flower Scissor Modelling Accessories Supplies Kit Multi
- SAFE, BPA-FREE PLASTIC FOR WORRY-FREE CRAFTING AND BAKING.
- COMPLETE 12-PIECE SET FOR VERSATILE CAKE AND CRAFT PROJECTS.
- SIMPLE TO USE, GREAT FOR BEGINNERS AND DIY ENTHUSIASTS ALIKE!

Kootek 71PCs Cake Decorating Kit, Baking Supplies Tools - Includes Cake Stand Turntable, 12 Icing Piping Tips, 2 Frosting Spatulas, 3 Scrapers, 50+2 Piping Bags, Coupler, Video Tutorial, Booklet
- ALL-IN-ONE KIT: EVERYTHING YOU NEED TO BAKE LIKE A PRO!
- 360° TURNTABLE FOR FLAWLESS CAKE DECORATION EVERY TIME.
- VERSATILE PIPING TIPS AND BAGS FOR ENDLESS CREATIVE DESIGNS!
To install CakePHP on GoDaddy, follow these steps:
- Download CakePHP: Go to the official CakePHP website (https://cakephp.org) and download the latest stable version of CakePHP.
- Upload CakePHP files: Extract the downloaded CakePHP files on your local computer. Connect to your GoDaddy hosting account using FTP or FileManager and navigate to the root folder of your desired website.
- Upload the extracted CakePHP files to the root folder of your website on GoDaddy.
- Configure database: Create a new MySQL database on your GoDaddy hosting account. Take note of the database name, username, and password.
- Configuration files: In the CakePHP folder, locate the "config" folder. Inside, you will find two configuration files: "app.php.default" and "database.php.default".
- Rename both "app.php.default" and "database.php.default" to "app.php" and "database.php" respectively.
- Configure database settings: Open the "app.php" file in a text editor. Look for the 'Datasources' section and update the appropriate fields with your database details. Save the changes.
- Configure security salt: Still in the "app.php" file, find the 'Security' section. Change the value of the 'salt' field to a unique string. Save the changes.
- Test your setup: Open a web browser and navigate to your CakePHP website (e.g., http://yourdomain.com). If everything is set up correctly, you should see the CakePHP default home page.
- Set up RewriteBase: If your website is located in a subdirectory or subdomain, you may need to update the "config/app.php" file. Look for the 'RewriteBase' setting and modify it accordingly. Save the changes.
That's it! You have successfully installed CakePHP on GoDaddy. You can now start customizing and developing your CakePHP application on your hosting account.
What is the process of troubleshooting CakePHP installation on GoDaddy?
Troubleshooting CakePHP installation on GoDaddy involves a series of steps to identify and resolve any issues that may arise during the installation process. Here's a general outline of the process:
- Verify GoDaddy Hosting: Make sure that your GoDaddy hosting plan meets the minimum requirements for running CakePHP. Check if it supports the required PHP version, extensions, and database functionality.
- Download and Extract CakePHP: Obtain the latest version of CakePHP from the official website and extract the files on your local machine.
- Transfer Files to GoDaddy: Transfer the extracted CakePHP files to your GoDaddy hosting account using an FTP client or GoDaddy's provided file manager.
- Set Folder Permissions: Ensure that the necessary folders within your CakePHP installation have adequate read and write permissions. Typically, the 'tmp' folder needs to be writable.
- Configure Database: Update the database configuration file (database.php) in the app/config folder to reflect the correct database credentials for your GoDaddy account.
- Ensure mod_rewrite is Enabled: Verify if mod_rewrite is enabled on your GoDaddy hosting account. You can do this by creating an 'htaccess' file containing the following code:
<IfModule mod_rewrite.c> RewriteEngine on RewriteRule ^$ webroot/ [L] RewriteRule (.*) webroot/$1 [L]
Upload this file to your CakePHP root directory and access it via a browser. If it is enabled, you should see a success message; otherwise, you may need to contact GoDaddy support for assistance.
- Enable Debugging: Set CakePHP's debug mode to a higher level (e.g., 2) in the app/config/core.php file. This will enable detailed error messages that can help in troubleshooting.
- Check Error Logs: If you encounter any errors, check the server's error logs to get more insights into the problem. GoDaddy provides access to error logs through cPanel or SSH.
- Verify URL Configuration: Ensure that the correct base URL is configured in the app/config/core.php file. If your app is in a subdirectory, make necessary adjustments.
- Clear Cache: If you make changes to configuration files or encounter issues with cache, clear the CakePHP cache. Delete the contents of the tmp/cache folder.
- Test and Fix Issues: Finally, test your CakePHP installation by accessing your application through a web browser. Monitor for any errors or unexpected behavior and troubleshoot them accordingly. Common issues may include incorrect paths, database connection problems, or misconfigured Apache settings.
Remember, this is a general guide, and specific troubleshooting steps might vary depending on the nature of the problem and your hosting environment.
What is the default configuration for CakePHP on GoDaddy?
The default configuration for CakePHP on GoDaddy may vary depending on the specific hosting plan and the version of CakePHP being used. However, here is a general outline of the steps to configure CakePHP on GoDaddy:
- Upload files: Upload the CakePHP files to your GoDaddy hosting account. You can do this by either using FTP or File Manager in your GoDaddy account.
- Set directory structure: Ensure that the directory structure of your CakePHP application is correctly set up on the server. By default, the CakePHP webroot directory (containing the index.php file) should be set as the web root of your domain in GoDaddy.
- Database configuration: CakePHP requires database connections for its functioning. In the config directory of your CakePHP application, locate the app.default.php file. Rename this file to app.php. Open the app.php file and update the database configuration settings to match your GoDaddy database setup (hostname, username, password, database name, etc.).
- Security salt: In the app.php file, find the salt directive and update it with a unique value. It is used for generating secure hash codes and should not be shared with others.
- Configure URL rewriting: Check if the mod_rewrite module is enabled in your GoDaddy hosting account. If not, enable it. Then, create an .htaccess file in your CakePHP application root directory, with the following content:
<IfModule mod_rewrite.c> RewriteEngine on RewriteBase / RewriteRule ^$ webroot/ [L] RewriteRule (.*) webroot/$1 [L]
- Check PHP version: Ensure that your GoDaddy hosting account is running a compatible version of PHP for the CakePHP version you are using. CakePHP usually requires PHP 7.2 or above.
- Configure virtual host: If you encounter any issues related to URL rewriting, you may need to check the virtual host configuration. Consult GoDaddy's documentation or support for guidance on configuring virtual hosts.
Once you have completed these steps, your CakePHP application should be configured and ready to use on GoDaddy.
What is the recommended directory structure for CakePHP on GoDaddy?
The recommended directory structure for CakePHP on GoDaddy is typically the same as the standard directory structure for CakePHP. Here is a common recommended structure:
- public_html/ (or www/) All the public-facing files for your website should go in this directory. Contains index.php, .htaccess, and other publicly accessible files.
- cakephp/ This directory should contain all the CakePHP files and directories. You can either download and extract the CakePHP framework into this directory, or use Composer to install it.
- app/ Contains the main application code and configuration files. Includes directories for models, controllers, views, configuration, and other application-specific files.
- lib/ Contains framework-specific libraries and code. This directory is usually included in the Composer dependencies, so you don't have to manage it manually.
- plugins/ If you are using any CakePHP plugins, you can install them in this directory. Each plugin should have its own subdirectory.
- tmp/ Contains temporary files and cache files created by CakePHP. It should be writable by the web server process.
- logs/ Contains log files generated by CakePHP. It should also be writable by the web server process.
It's important to note that the specific directory structure may vary depending on your needs and preferences. However, this structure provides a good starting point for organizing your CakePHP project on GoDaddy.
What are the steps to installing CakePHP on GoDaddy?
Installing CakePHP on GoDaddy involves the following steps:
Step 1: Prepare your GoDaddy account
- Purchase a GoDaddy hosting plan and domain.
- Make sure you have FTP access to your GoDaddy hosting account.
Step 2: Prepare your local development environment
- Download and install a local development environment like XAMPP or WAMP.
- Create a new database for your CakePHP application.
Step 3: Download and configure CakePHP
- Download the latest stable version of CakePHP from the official website (https://cakephp.org/).
- Extract the downloaded files and upload them to your GoDaddy hosting account using an FTP client.
- Rename the config/app.default.php file in your CakePHP installation to config/app.php.
- Open the config/app.php file and update the database configuration with your GoDaddy hosting database details.
Step 4: Set up the domain and directory on GoDaddy
- Log in to your GoDaddy account and go to the "My Products" page.
- Find your hosting account and click on the "Manage" button.
- In the "Settings" tab, scroll down to the "Domain" section and click on the "Manage" button.
- Click on "Add Domain" and enter your desired subdomain or domain name.
- Choose the document root where your CakePHP installation is located.
- Save the changes.
Step 5: Configure the .htaccess file
- Open the .htaccess file located in the root folder of your CakePHP installation.
- Uncomment the line RewriteBase / and replace it with RewriteBase /your-domain-name/ (e.g., RewriteBase /myapp/) if your CakePHP installation is in a subdirectory.
- Save the changes.
Step 6: Access your CakePHP application
- Open a web browser and navigate to your domain/subdomain name (e.g., http://your-domain-name.com or http://subdomain.your-domain-name.com).
- You should see the default CakePHP welcome page.
Congratulations! You have successfully installed CakePHP on GoDaddy. You can now start building your application.