Best Tools for TensorFlow Installation on Mac to Buy in November 2025
SakerNeo 15PCS Universal Auxiliary Belt Tensioner Tool Kit,12-Point 12-19mm (0.47"-0.74"),Stretch Belt Installation & Pulley Removal Tool,Timing Belt Tension Pulley Wrench Set for Most Vehicle Types
-
EFFORTLESS ACCESS: 9.8 CURVED HANDLE REACHES TIGHT ENGINE SPACES EASILY.
-
ULTIMATE VERSATILITY: 15-PIECE KIT TACKLES A WIDE RANGE OF AUTOMOTIVE TASKS.
-
BUILT TO LAST: INDUSTRIAL-GRADE STEEL RESISTS RUST, CORROSION, AND DEFORMATION.


aremnry 5460 Belt Tension Compressor Tool Kit for Automotive Repair Heavy Duty Serpentine Belt Tensioner Tool, Compatible with Car Truck SUV, Universal Belt Removal Installation Tool
-
QUICK REMOVAL & INSTALLATION FOR MULTIPLE VEHICLE TYPES-SAVES TIME!
-
HEAVY-DUTY CONSTRUCTION ENSURES DURABILITY & REDUCES HAND FATIGUE.
-
UNIVERSAL FIT DESIGN ELIMINATES NEED FOR MULTIPLE TOOLS-COST-EFFECTIVE!
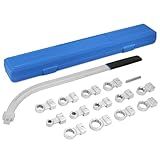
15PCS Universal Auxiliary Idler Belt Tensioner Pulley Removal Tool Kit, 12-Point 12-19mm (0.47"-0.74") Serpentine Belt Tension Pulley Wrench Set, Engine Timing Belt Tensioning Nut Bolt Screw Remover
- PERFECT FOR TIGHT ENGINE SPACES, EASING YOUR REPAIR TASKS!
- INCLUDES MULTIPLE ADAPTERS FOR COMPATIBILITY WITH ALL CAR MODELS.
- DURABLE, HIGH-QUALITY STEEL TOOLS ENSURE LONG-LASTING PERFORMANCE.

ReluxGo Tension Adjuster Pulley Wrench Tool Engine Timing Belt Tensioner Wrench Tension Pulley Spanner Compatible for VW Audi
- PREMIUM CADMIUM-PLATED STEEL FOR UNMATCHED DURABILITY AND CORROSION RESISTANCE.
- SPECIAL LOW-PROFILE DESIGN ADJUSTS TIMING BELT FOR VARIOUS VW ENGINES.
- FIVE VARIABLE POSITIONS FOR VERSATILE USE IN TIGHT SPACES AND DIVERSE VEHICLES.
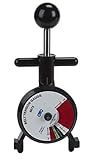
OTC 6673 Belt Tension Gauge, Universal
- ENSURES MAXIMUM BELT AND BEARING LIFE WITH PROPER TENSION CHECKS.
- EASY-TO-READ DUAL SCALE FOR QUICK AND ACCURATE MEASUREMENT.
- DURABLE, HIGH-GRADE MATERIALS FOR LONG-LASTING PERFORMANCE.
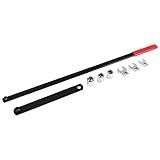
JEGS W84010 Serpentine Belt Tool Fits: (idler pulleys requiring)
- SPRING-LOADED DESIGN EFFICIENTLY RELEASES TENSION ON SERPENTINE BELTS.
- CUSHIONED RED HANDLE ENSURES COMFORT AND EASE OF USE.
- HIGH-QUALITY PRODUCT FROM CHINA, PERFECT FOR SPORTING GOODS ENTHUSIASTS.
QWORK 15PCS Universal Auxiliary Belt Tensioner Pulley Removal Tool Kit, Engine Timing Belt Tension Wrench Set with Multi-Size Adapters & Carrying Case
- 15 ESSENTIAL PIECES FOR EFFICIENT PULLEY TENSIONER REMOVAL INCLUDED.
- HIGH COMPATIBILITY WITH VARIOUS ADAPTERS FOR NEARLY ALL CAR MODELS.
- DURABLE STEEL CONSTRUCTION ENSURES LONG-LASTING PERFORMANCE AND RELIABILITY.
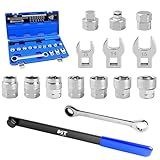
SGT 15-Piece Universal Ratcheting Serpentine Belt Tool Set,Serpentine Belt Tool Kit with Ratcheting Wrench Sockets Adapters Crowfoot Wrenches Extension for Installing and Removing Pulleys and Belts
- EFFORTLESSLY REMOVE/INSTALL SERPENTINE BELTS WITH RATCHETING EASE.
- DURABLE CR-V STEEL CONSTRUCTION ENSURES LONG-LASTING, RELIABLE USE.
- CONVENIENT STORAGE CASE KEEPS TOOLS ORGANIZED & EASY TO TRANSPORT.
To install TensorFlow on a Mac, you can follow these steps:
- Open Terminal: You can find Terminal by navigating to Applications → Utilities folder.
- Install Homebrew: Homebrew is a package manager that facilitates installing software on a Mac. Paste the following command in Terminal and hit Enter: /bin/bash -c "$(curl -fsSL https://raw.githubusercontent.com/Homebrew/install/master/install.sh)"
- Install Python: TensorFlow requires Python 3.7 or later. Use Homebrew to install Python by running the following command: brew install python
- Set up a virtual environment: It's recommended to create a virtual environment to isolate TensorFlow and its dependencies. Run the following command: python3 -m venv tensorflow
- Activate the virtual environment: Activate the virtual environment using the command: source tensorflow/bin/activate
- Install TensorFlow: Once the virtual environment is activated, you can install TensorFlow using pip, the package installer for Python: pip install --upgrade pip pip install --upgrade tensorflow
- Verify the installation: You can verify the TensorFlow installation by running a simple program: python In the Python shell, enter the following: import tensorflow as tf print(tf.__version__) If TensorFlow is installed correctly, the version number should be displayed.
That's it! TensorFlow is now successfully installed on your Mac. Remember to deactivate the virtual environment when you're done using TensorFlow by running deactivate in Terminal.
How to install CUDA on Mac for TensorFlow GPU support?
To install CUDA on Mac for TensorFlow GPU support, you can follow these steps:
- Verify that your Mac has an NVIDIA GPU by going to the Apple menu -> About This Mac -> System Report -> Graphics/Displays. Make sure your GPU is listed as NVIDIA.
- Check if your GPU is compatible with the CUDA toolkit by referring to NVIDIA's website.
- Download the CUDA Toolkit from NVIDIA’s website. Go to https://developer.nvidia.com/cuda-downloads, select Mac OS, your GPU architecture, and version of macOS, then download the CUDA Toolkit installer.
- Run the CUDA Toolkit installer package and follow the instructions to complete the installation. During the installation process, you may be required to enter your system password.
- After the installation completes, go to the Terminal application on your Mac.
- Verify that CUDA is properly installed by running the command: nvcc --version. You should see the version number of your installed CUDA toolkit.
- Set the necessary environment variables by adding the following lines to your .bashrc, .zshrc, or equivalent shell configuration file: export PATH="/usr/local/cuda/bin:$PATH" export LD_LIBRARY_PATH="/usr/local/cuda/lib:$LD_LIBRARY_PATH" Save the file and close the terminal.
- Install TensorFlow using pip, or create a virtual environment and then install TensorFlow as per your preference.
After completing these steps, TensorFlow should be able to utilize your GPU for accelerated computation. You can verify GPU support in TensorFlow by running the following Python code:
import tensorflow as tf tf.config.list_physical_devices('GPU')
If your GPU is listed, it means TensorFlow is successfully configured with GPU support.
What is the Anaconda Navigator and how does it help in TensorFlow installation?
Anaconda Navigator is a graphical user interface (GUI) included with the Anaconda distribution, which is a popular Python distribution used for data science and machine learning. It helps in managing and organizing packages, environments, and channels in Anaconda.
When it comes to TensorFlow installation, Anaconda Navigator provides a convenient way to create and manage a specific environment for TensorFlow. This is advantageous because TensorFlow often requires specific versions of Python and other dependencies to work properly. With Anaconda Navigator, you can create a separate environment specifically for TensorFlow, ensuring that all the required packages and versions are installed correctly. This helps in avoiding conflicts and compatibility issues with other Python libraries installed on your system.
Anaconda Navigator also allows you to install TensorFlow and other related packages with a few clicks, making the installation process easier and more user-friendly, particularly for beginners who may be unfamiliar with command-line installation procedures.
What are the TensorFlow dependencies and how to install them on Mac?
The dependencies for TensorFlow on Mac are:
- Python: TensorFlow requires Python 3.5, 3.6, or 3.7.
- pip: Python package installer, which is usually already installed with Python. You can upgrade it using: pip install --upgrade pip
- Virtualenv (optional): Helps in creating isolated Python environments. You can install it using: pip install virtualenv
- CUDA Toolkit (optional): Required only if you want to use TensorFlow with GPU support.
To install TensorFlow on Mac, follow these steps:
- Open a terminal window.
- Create a new virtual environment (optional): This step is recommended to keep TensorFlow installation isolated from other Python packages. Run the command: virtualenv --system-site-packages -p python3 ./venv to create a new virtual environment.
- Activate the virtual environment: Run the command: source ./venv/bin/activate to activate the virtual environment.
- Install TensorFlow: Run the command: pip install tensorflow. This will install the CPU version of TensorFlow. If you want GPU support, use: pip install tensorflow-gpu.
- Verify the installation: Run the command: python -c "import tensorflow as tf;print(tf.reduce_sum(tf.random.normal([1000, 1000])))". If TensorFlow is installed correctly, it will print a random sum value.
Note: If you have a GPU and want to use TensorFlow with GPU support, you'll need to install CUDA Toolkit and cuDNN as well. Their specific versions depend on the TensorFlow version and your GPU architecture. You can refer to the TensorFlow documentation for detailed instructions on installing CUDA Toolkit and cuDNN.
How to install TensorFlow on Mac?
To install TensorFlow on Mac, follow these steps:
- Open a terminal window.
- Create a virtual environment by running the following command: python3 -m venv tensorflow
- Activate the virtual environment by running: source tensorflow/bin/activate
- Install TensorFlow by running: pip install --upgrade tensorflow Note: If you have a compatible GPU, you can install TensorFlow with GPU support by using the command: pip install --upgrade tensorflow-gpu
- Verify the installation by running a simple TensorFlow program. Run the following command to open a Python interpreter: python
- In the Python interpreter, import TensorFlow and check the version: import tensorflow as tf print(tf.__version__) If TensorFlow is successfully installed, it will display the version number without any errors.
- When you're done, deactivate the virtual environment by running: deactivate
That's it! You have successfully installed TensorFlow on your Mac.
How to upgrade TensorFlow to a newer version on Mac?
To upgrade TensorFlow to a newer version on Mac, you can follow these steps:
- Open a terminal or command prompt.
- Activate your TensorFlow environment. If you are using a Python virtual environment, activate it by running the appropriate command. For example, if you are using Anaconda, you can use the command conda activate my_env.
- Run the command to upgrade TensorFlow using pip. Depending on your TensorFlow installation, you may need to specify the version or additional options. The general command to upgrade TensorFlow is: pip install --upgrade tensorflow If you have a specific version in mind, you can specify it like this: pip install --upgrade tensorflow==2.4.1 If you want to install a specific version of TensorFlow with GPU support, use the following command instead: pip install --upgrade tensorflow-gpu==2.4.1 Replace 2.4.1 with the version you want to install or upgrade to.
- Wait for the installation to complete. The process might take some time, depending on the version you are upgrading to and your internet connection speed.
- Once the upgrade is finished, you can verify the installation by importing TensorFlow in a Python shell or IDE and checking the version. Run the following code to check the TensorFlow version: import tensorflow as tf print(tf.__version__) The output should indicate the version you just upgraded to.
That's it! You have successfully upgraded TensorFlow to a newer version on your Mac.