
Best Cloud Hosting Solutions to Buy in November 2025

Steadfast Self-Hosting: Rapid-Rise Personal Cloud


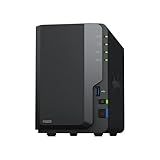
Synology 2-Bay NAS DS223 (Diskless)
- 100% DATA OWNERSHIP WITH EASY MULTI-PLATFORM ACCESS!
- EFFORTLESS FILE SHARING KEEPS CLIENTS IN SYNC AND ENGAGED.
- SMART SURVEILLANCE TOOLS FOR ULTIMATE HOME PROTECTION!
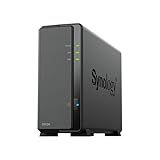
Synology 1-Bay DiskStation DS124 (Diskless) Black
-
CENTRALIZED DATA HUB: OWN AND ACCESS ALL YOUR DATA ANYTIME, ANYWHERE.
-
SEAMLESS SHARING: EFFORTLESSLY SYNC AND COLLABORATE ACROSS ALL DEVICES.
-
SMART SURVEILLANCE: SCALABLE VIDEO SECURITY THAT GROWS WITH YOUR BUSINESS.
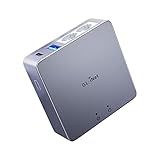
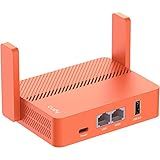
GL.iNet MT2500A (Brume 2) Mini VPN Security Gateway for Home Office and Remote Work-VPN Server&Client for Home and Office, VPN Cascading, Internet Security, 2.5G WAN, *NO Wi-Fi* (Aluminium Alloy Case)
-
SPEEDY PERFORMANCE: ENJOY OPENVPN SPEEDS UP TO 150 MBPS & WIREGUARD UP TO 355 MBPS.
-
ROBUST SECURITY: CLOUDFLARE ENCRYPTION & IPV6 PROTECTION FOR TOTAL PRIVACY.
-
VERSATILE CONNECTIVITY: SUPPORTS SIMULTANEOUS VPN SERVER & CLIENT USE.
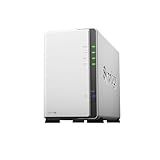
Synology 2-Bay DiskStation DS223j (Diskless)
- 100% DATA OWNERSHIP & MULTI-PLATFORM ACCESS, ANYTIME, ANYWHERE!
- EFFORTLESSLY SHARE FILES & KEEP YOUR TEAM ON THE SAME PAGE!
- COMPREHENSIVE BACKUP OPTIONS ENSURE YOUR DATA IS ALWAYS SAFE!

Building and Self-Hosting a Home Mac Server
Cudy AC1200 Pocket-Sized Wi-Fi Travel Router, Extender/Repeater for Hotel&Public Network, WISP, VPN Client and Server, USB,TR1200
- BLAZING FAST AC1200 SPEEDS: ENJOY 867MBPS FOR GAMING & STREAMING.
- ROBUST VPN SUPPORT: KEEP YOUR DATA SECURE WITH MULTIPLE VPN OPTIONS.
- VERSATILE HOTSPOT SHARING: EASILY CONVERT PUBLIC WI-FI TO SECURE NETWORKS.
To run Next.js on Cloudways, follow these steps:
- Start by logging into your Cloudways account.
- In the Cloudways dashboard, click on the "Servers" tab on the top menu.
- Select the server or create a new one where you want to run Next.js from the servers list.
- Once you are on the server detail page, click on the "Deployment" tab on the left-hand side menu.
- Under the "Deployment Via Git" section, select your desired application from the dropdown menu.
- Choose the repository type (Git or Mercurial) and provide the repository URL.
- Fill in your repository credentials, whether it is a public or a private repository.
- Specify the branch you want to deploy, and if needed, add a subdirectory.
- Finally, click on the "Launch" button to start the deployment process.
Cloudways will automatically fetch the code from your Git repository and deploy your Next.js application onto the specified server. You can monitor the deployment process from the "Server Management" section. Once the deployment is complete, you will be able to access your Next.js application through the provided URL.
By following these steps, you can easily run your Next.js application on Cloudways and take advantage of their managed hosting services for optimal performance and scalability.
What are the available options for logging and error tracking in a Next.js application on Cloudways?
There are several options for logging and error tracking in a Next.js application on Cloudways:
- Cloudways Built-in Logs: Cloudways provides a built-in logging feature that captures server logs, including Nginx access/error logs and application logs. You can access these logs from the Cloudways platform's Server Management tab.
- PM2 Logs: Next.js uses PM2 process manager by default. PM2 logs can be accessed from the Cloudways platform's Application Management tab. PM2 logs include application-related logs, such as server-side rendering (SSR) errors and application crashes.
- Cloudways Application Manager: Cloudways provides an Application Manager feature that allows you to view and monitor various metrics, including real-time application logs, server logs, and request/response logs. You can access this feature from the Cloudways platform's Application Management tab.
- Third-Party Logging Services: Cloudways allows you to integrate with third-party logging services. For example, you can integrate with services like Loggly, Papertrail, or Logentries using the corresponding configuration settings provided by Cloudways. These services provide advanced logging and error tracking capabilities, including centralized log management, alerts, and search functionalities.
- Custom Logging Solutions: You can implement custom logging solutions within your Next.js application. Next.js provides a built-in logger called "pino" that can be used for logging. You can configure pino to log events and errors to various destinations, such as console, files, or external services.
Remember to consider the cost, ease of integration, and specific requirements of your project when choosing a logging and error tracking solution for your Next.js application on Cloudways.
How to implement search functionality in a Next.js application on Cloudways?
To implement search functionality in a Next.js application on Cloudways, follow these steps:
- Create an API endpoint: You will need to create an API endpoint on your server to handle search requests. Next.js provides the API routes feature to create custom API endpoints. You can create an /api/search route to handle search requests.
- Install and configure a search library: Choose a search library that fits your requirements. Some popular options include ElasticSearch, Algolia, and Lunr.js. Install the library using npm or yarn and configure it to connect to your application.
- Implement the search logic: In your /api/search route, implement the search logic using the chosen search library. This could involve sending search queries, filtering results, and returning the response.
Here's an example implementation using ElasticSearch:
import elasticSearch from 'elasticsearch';
const client = new elasticSearch.Client({ hosts: ['http://localhost:9200'] // Replace with your ElasticSearch server URL });
export default async (req, res) => { const { q } = req.query; // Get the search query from the request
try { const response = await client.search({ index: 'your_index_name', // Replace with your index name body: { query: { match: { title: q // Replace with the field you want to search on } } } });
res.status(200).json(response.hits.hits.map(hit => hit.\_source));
} catch (error) { res.status(500).json({ error: 'An error occurred' }); } };
- Add search form in your Next.js component: In your Next.js component, add a search form where users can input their search queries. On form submission, trigger a fetch request to your /api/search endpoint, passing the search query as a parameter. Update your component's state or render the search results accordingly.
Note: Remember to replace the placeholder values (your_index_name, title, http://localhost:9200) in the code with your actual values.
By following these steps, you can implement search functionality in a Next.js application on Cloudways.
How to implement authentication and user management in a Next.js application on Cloudways?
To implement authentication and user management in a Next.js application on Cloudways, you can follow these steps:
- Create a Cloudways account and set up your Next.js application on the Cloudways platform.
- Choose a suitable authentication and user management solution for your application. Some popular options are Firebase Authentication, Auth0, Passport.js, or implementing your own custom authentication system.
- Install the necessary packages for your chosen authentication solution. For example, if you're using Firebase Authentication, you can install the firebase package.
- Set up the authentication provider by configuring the necessary credentials and settings. This process may vary depending on your chosen solution.
- Create the login and signup pages/routes for your application. These pages should include forms to collect user credentials and integrate them with your authentication solution.
- Implement authentication logic such as user registration, login, logout, and password reset.
- Ensure that sensitive routes or components are protected and can only be accessed by authenticated users. You can use higher-order components (HOCs) or Next.js middleware to restrict access to certain pages or components.
- Store the user authentication state in a secure way. You can use Next.js built-in contexts or a state management library like Redux or MobX to manage the authentication state.
- Implement user management functionalities like profile editing, account deletion, or password change as required by your application.
- Test the authentication and user management flow thoroughly to ensure it works as expected.
Additionally, it may be helpful to consult the documentation or tutorials provided by your chosen authentication solution for more detailed instructions on integrating it with a Next.js application.