
Best Servers for Prometheus Deployment to Buy in November 2025

GMKtec Mini PC Workstation, Intel Core i9 13900HK(14C/20T) up to 5.4GHz, Mini Computer 32GB DDR5 RAM 1TB SSD, 8X USB Ports/COM/HDMI/DP Office Business
-
UNMATCHED PERFORMANCE: I9-13900HK CPU WITH 14 CORES FOR SEAMLESS MULTITASKING.
-
EXPANSIVE STORAGE: 32GB DDR5 RAM & 1TB SSD; SCALABLE UP TO 12TB!
-
QUAD-SCREEN SUPPORT: ULTRA-HD 8K DISPLAY FOR MULTI-SCREEN PRODUCTIVITY.


KAMRUI GK3Plus Mini PC, 16GB RAM 512GB M.2 SSD Mini Computers,12th Alder Lake N95 (up to 3.4GHz) Micro PC, 2.5''SSD, Gigabit Ethernet,4K UHD,Three Screen Display, WiFi,BT,VESA/Home/Business Small pc
- EXPERIENCE 35% FASTER CPU AND 78% BETTER GPU PERFORMANCE!
- EXPANDABLE STORAGE UP TO 2TB FOR ALL YOUR NEEDS!
- COMPACT DESIGN FITS ANYWHERE WITH IMPRESSIVE 4K GRAPHICS!
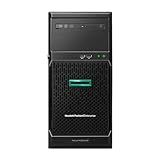
Hewlett Packard Enterprise HPE ProLiant ML30 Gen10 Plus Tower Server, Xeon E-2314 4-Core 2.8GHz CPU, 32GB DDR4 Memory, 4TB SSD Storage, RAID, iLO
- TURBOCHARGED XEON CPU: 4.5GHZ SPEED FOR MAXIMUM PERFORMANCE.
- 4TB SSD STORAGE: ULTRA-FAST DATA ACCESS FOR YOUR GROWING BUSINESS.
- 32GB RAM ENSURES SMOOTH MULTITASKING FOR EFFICIENT WORKFLOWS.
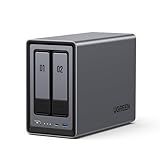
UGREEN NASync DXP2800 2-Bay Desktop NAS, Intel N100 Quad-core CPU, 8GB DDR5 RAM, 2.5GbE, 2X M.2 NVMe Slots, 4K HDMI, Network Attached Storage (Diskless)
- ONE-TIME PURCHASE: SAVE MONEY WITH NO ONGOING CLOUD FEES!
- STORE 76TB: ENOUGH SPACE FOR ALL YOUR FILES, PHOTOS, AND VIDEOS!
- AI PHOTO ORGANIZATION: EFFORTLESSLY MANAGE AND FREE UP STORAGE!

Lipper International Acacia Oblong Salad Servers, 12" Long, One Pair
- ELEGANT SERVERS ENHANCE ANY SALAD BOWL DISPLAY (BOWLS SOLD SEPARATELY).
- UNIQUE OBLONG DESIGN ADDS SOPHISTICATION TO YOUR DINING EXPERIENCE.
- DURABLE ACACIA WOOD: EASY CARE AND PERFECT FOR EVERYDAY USE.

ZPARNO 6 Pack Server Note Pads, Pink Guest Checks Books for Servers, Server Pads, Total 300 Sheets Server Paper, Waitress Notepads for Restaurants
- EFFICIENT ORDER MANAGEMENT: 8 LINES FOR UP TO 8 GUESTS SIMPLIFY ORDERS.
- DURABLE QUALITY: STURDY MATERIAL ENSURES EASY WRITING AND TEAR-OFF.
- VERSATILE USE: PERFECT FOR ANY FOOD ESTABLISHMENT-RESTAURANT OR BAR!
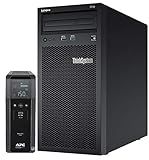
Lenovo ThinkSystem ST50 Tower Server Bundle Including APC BR1500MS 1500VA UPS, Intel Xeon 3.4GHz CPU, 32GB DDR4 2666MHz RAM, 6TB HDD Storage, JBOD RAID
-
POWERFUL PERFORMANCE: INTEL XEON E-2124G, 4.5GHZ TURBO BOOST.
-
MASSIVE STORAGE: 6TB HDD CAPACITY WITH JBOD RAID FOR DATA SAFETY.
-
RELIABLE BACKUP: APC UPS ENSURES UNINTERRUPTED POWER FOR YOUR WORKFLOW.

ZPARIK 6 Pack Guest Checks Books for Servers Server Note Pads, Waiter Checkbook, Waitress Notepad for Restaurants, Paper Checks 50 Sheets/Pack, 300 Total Tickets
- 300 TICKET SHEETS: 6 PADS WITH 50 SLIPS EACH FOR ENDLESS EFFICIENCY.
- USER-FRIENDLY DESIGN: TEAR-FREE SLIPS & EXTRA ROWS FOR EASY NOTE TAKING.
- HIGH QUALITY & CLEAR LAYOUT: DURABLE, DOUBLE-SIDED FOR CLEAR HANDWRITING.
To run Prometheus on Linode, follow these steps:
- Start by signing up for a Linode account at https://www.linode.com/. Choose a plan that suits your requirements and complete the registration process.
- Once you have signed up, access your Linode dashboard. Click on "Create" and select "Linode" from the dropdown menu.
- Choose a location for your Linode server and provide a unique name for your Linode instance.
- Select the desired plan for your server. Ensure that the resources allocated to your server meet the minimum requirements for running Prometheus effectively.
- Scroll down and click on "Add a StackScript" under the "Settings" section. This will allow you to configure your Linode server with the necessary software.
- In the "StackScript" field, enter the following script to automatically install Prometheus:
#!/bin/bash apt-get update apt-get install -y prometheus
- Choose the desired Linux distribution and click on "Create" to provision your Linode server with the selected configuration.
- Once your Linode instance is created, you will receive an IP address for your server. Make note of this IP address.
- Open a terminal on your local machine and establish an SSH connection to your Linode server using the following command:
ssh root@
Replace <your-linode-ip-address> with the actual IP address of your Linode server.
- Once you are connected to your Linode server via SSH, run the following command to start Prometheus:
systemctl start prometheus
- Verify that Prometheus is running correctly by visiting http://:9090 in your web browser. You should see the Prometheus UI.
- To ensure Prometheus starts automatically when the server reboots, run the following command:
systemctl enable prometheus
That's it! You have successfully set up Prometheus on your Linode server. You can now configure and use Prometheus for monitoring your applications and infrastructure.
What are the essential metrics to monitor with Prometheus on Linode?
When monitoring a Linode server with Prometheus, some essential metrics to monitor include:
- CPU Usage: This metric monitors the percentage of CPU resources used by the server. High CPU utilization may indicate a need for more resources or optimization of processes.
- Memory Usage: Monitoring memory usage allows you to ensure that the server has enough memory available for its operations. High memory usage can lead to performance degradation or even crashes.
- Disk Usage: Monitoring the disk space usage on the server helps identify if the storage is running out of space. Low disk space can impact the performance of applications or cause disruptions.
- Network Traffic: Monitoring network traffic provides insights into the amount and patterns of data flowing in and out of the server. It helps identify potential bottlenecks, abnormal activity, or excessive bandwidth consumption.
- Response Time: Monitoring the response time of critical services or applications hosted on the server helps ensure a fast and efficient user experience. Slow response times may indicate performance issues that need to be addressed.
- Error Rates: Monitoring the rate of errors occurring in applications or services helps identify issues and diagnose their root causes. High error rates might indicate bugs, misconfigurations, or external factors affecting the system.
- Uptime and Availability: Monitoring server uptime and availability ensures that the system remains accessible to users. This metric helps identify and analyze downtime events, enabling proactive responses to prevent extended outages.
- Custom Application Metrics: Depending on the specific applications or services running on the server, it may be essential to monitor application-specific metrics. These metrics help gauge the health and performance of the application itself, such as request counts, latency, or database query execution times.
By monitoring these essential metrics with Prometheus on Linode, you can gain valuable insights into the server's performance, detect anomalies, and proactively address potential issues before they impact user experience.
What is the purpose of time-series data in Prometheus?
The purpose of time-series data in Prometheus is to analyze and monitor the performance and behavior of systems and applications over time. Time-series data consists of a timestamp and a corresponding value, which represents a specific metric or observation at that point in time.
Prometheus collects and stores time-series data from various sources, including targets it monitors. This data is used for generating alerts, creating visualizations, and conducting analysis to gain insights into the system's performance, detect anomalies, identify trends, and troubleshoot issues.
By analyzing time-series data, Prometheus enables users to understand how metrics change over time, track historical patterns, measure the impact of changes or configurations, and make data-driven decisions for optimizing system performance and reliability.
How to backup and restore Prometheus data on Linode?
To backup and restore Prometheus data on Linode, you can follow these steps:
- Install Prometheus: If you haven't already, start by installing Prometheus on your Linode server. You can follow the Prometheus installation guide for your specific operating system.
- Stop Prometheus: Before starting the backup process, it's important to stop Prometheus to ensure a consistent backup of its data. You can use the following command to stop Prometheus: sudo systemctl stop prometheus
- Backup Prometheus Data Directory: The Prometheus data is typically stored in a directory defined in the Prometheus configuration file. By default, the data is stored in the /var/lib/prometheus directory. To backup this directory, you can use the rsync command: sudo rsync -avz /var/lib/prometheus /path/to/backup/location Replace /path/to/backup/location with the desired location where you want to store the backup.
- Start Prometheus: After the backup is completed, you can start Prometheus again using the following command: sudo systemctl start prometheus Note: Make sure to verify that Prometheus is functioning correctly after starting it.
To restore Prometheus data from the backup:
- Stop Prometheus: Use the same command mentioned earlier to stop Prometheus: sudo systemctl stop prometheus
- Restore the Backup: Use the rsync command again to restore the backup from the specified location to the original data directory: sudo rsync -avz /path/to/backup/location/prometheus /var/lib Replace /path/to/backup/location with the actual backup location.
- Update Permissions: After restoring the backup, it's important to update the permissions of the restored files. Use the following command to change ownership and permissions: sudo chown -R prometheus:prometheus /var/lib/prometheus
- Start Prometheus: Start Prometheus again to load the restored data: sudo systemctl start prometheus Verify that Prometheus is functioning correctly and accessing the restored data.
By following these steps, you should be able to backup and restore Prometheus data on your Linode server.