Best Drawing Tools for Canvas to Buy in November 2025

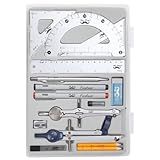
Mr. Pen Geometry Set with 6 Inch Swing Arm Protractor, Divider, Set Squares, Ruler, Compasses and Protractor, 15 Piece Set
- COMPLETE 15-PIECE SET FOR STUDENTS AT ALL LEVELS!
- INCLUDES ESSENTIAL TOOLS IN A PORTABLE REUSABLE POUCH.
- EXPERT-DESIGNED FOR PRECISION IN INCH AND CENTIMETER MEASUREMENTS.


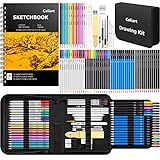
Caliart 176PCS Art Supplies Sketching Kit with 100 Sheets 3-Color Sketch Book, Graphite Colored Charcoal Watercolor & Metallic Pencils, Drawing Set Christmas Gifts for Adults Teens Girls Boys Kids
- ALL-IN-ONE KIT: 176 PREMIUM DRAWING SUPPLIES FOR ALL SKILL LEVELS!
- UNIQUE 3-COLOR SKETCH PAD: 100 SHEETS FOR VIBRANT CREATIVITY!
- PORTABLE CASE: TAKE YOUR ART SUPPLIES WHEREVER INSPIRATION STRIKES!
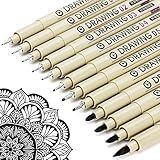
Muchcute Micro Fineliner Drawing Art Pens: 12 Black Fine Line Waterproof Ink Set Artist Supplies Archival Inking Markers Liner Sketch Outline Anime Gifts Manga Sketching Watercolor Zentangle Kit Stuff
-
VERSATILE MICRO PEN SET: 12 SIZES FROM 0.2MM TO 3.0MM FOR ALL NEEDS.
-
WATERPROOF & FADE RESISTANT: DURABLE INK ENSURES NO BLEED OR SMUDGE.
-
PERFECT GIFT FOR CREATIVES: STYLISH CASE FOR EASY STORAGE AND GIFTING.
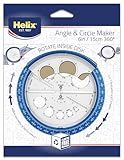
Helix Angle and Circle Maker with Integrated Circle Templates, 360 Degree, 6 Inch / 15cm, Assorted Colors (36002)
- CREATE PRECISE ANGLES AND CIRCLES WITH VERSATILE DESIGN!
- CONVENIENT INTEGRATED CIRCLE TEMPLATES FOR QUICK MEASUREMENTS.
- COMPACT 6-INCH DESIGN AND VIBRANT COLORS FOR PORTABILITY!
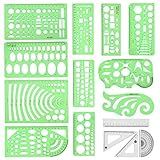
Angrox Geometric Drawings Templates Measuring Geometry Rulers 15 Pcs with 1 Pack File Bag for Design School Studying Office Building…
-
11 GEOMETRIC TEMPLATES FOR ENDLESS CREATIVITY ANYWHERE!
-
PRECISION RULERS: ACCURATE MEASUREMENTS FOR EVERY PROJECT!
-
DURABLE & CLEAR DESIGN: BUILT TO LAST WITH EASY READABILITY!
Mr. Pen- Professional Geometry Set, 15 pcs, Geometry Kit for Artists and Students, Geometry Set, Metal Rulers and Compasses, Drawing Tools, Drafting Supplies, Drafting Set, Drafting Tools and Kits
- ALL-IN-ONE SET: 12 ESSENTIAL TOOLS FOR STUDENTS AND PROFESSIONALS.
- DURABLE CASE: KEEP TOOLS SAFE AND ORGANIZED, EASY TO TRANSPORT.
- IDEAL GIFT: PERFECT FOR STUDENTS, TEACHERS, AND CREATIVE MINDS ALIKE.
To create a drawing tool on a canvas, you can follow these steps:
- HTML Setup: Start by creating an HTML document and include a canvas element. Give the canvas a width and height using the width and height attributes.
- JavaScript Setup: In your JavaScript code, get a reference to the canvas element using the document.getElementById() method. Store it in a variable for future use.
- Context Setup: Obtain the 2D drawing context of the canvas by calling the getContext() method. Set the context to "2d" and store it in a variable.
- Event Listeners: Add event listeners to the canvas to track mouse events such as mouse movement, clicks, and hold. You can use the addEventListener() function and specify the event type (e.g., "mousemove", "mousedown", "mouseup") along with a function that will be called when the event occurs.
- Drawing Functions: Define functions that will handle the drawing based on the mouse events. For example, you can create a function that starts drawing when the mouse is pressed down, tracks the mouse movement, and stops drawing when the mouse is released.
- Draw on Mouse Move: Inside the mousemove event function, use the context object's methods like beginPath(), moveTo(), and lineTo() to draw lines on the canvas. You can adjust the stroke color, line width, and style as needed.
- Start Drawing: In the mousedown event function, call the beginPath() method to start a new drawing path. Set the initial coordinates to the current mouse position using the context's moveTo() method.
- Stop Drawing: In the mouseup event function, call the context's closePath() method to end the current drawing path.
- Clean Up: To improve performance and prevent overlapping drawings, you may consider using the clearRect() method to clear the canvas before each new drawing.
- Additional Features: Depending on your requirements, you can implement additional drawing features such as different brush shapes, colors, erasers, and the ability to save or export the drawing.
Remember to test your code and refine it as needed. With these steps, you can create a simple drawing tool on a canvas using HTML, CSS, and JavaScript.
What is the benefit of using grids and guides in drawing tools?
Using grids and guides in drawing tools offers several benefits:
- Precision: Grids and guides allow for precise placement of elements in the drawing. They act as reference points, helping the artist align and position shapes, lines, and objects accurately.
- Consistency: By using grids and guides, artists can ensure consistent spacing and proportions across their artwork. This is particularly useful when creating patterns, dividing a canvas into sections, or maintaining symmetry in illustrations.
- Composition: Grids and guides help artists with composition and layout. They allow for the creation of balanced and visually pleasing compositions by following principles like the rule of thirds or the golden ratio.
- Perspective: Grids can be used to establish perspective in drawings, especially when creating complex scenes with multiple objects. Artists can use perspective grids to maintain correct proportions and angles within their artwork.
- Speed: By providing a visual framework, grids and guides can expedite the drawing process. Artists can quickly sketch or ink components of their artwork by using the grid or guide as a reference point, saving time and effort.
- Flexibility: Grids and guides are adaptable tools. Artists can adjust their spacing, size, and orientation according to their specific requirements. This flexibility allows artists to experiment with different layouts and compositions easily.
Overall, grids and guides in drawing tools enhance precision, consistency, composition, perspective, speed, and flexibility, enabling artists to create more refined and professional-looking artwork.
How to import and use custom brushes on a canvas?
To import and use custom brushes on a canvas, you can follow these general steps:
Step 1: Find or create the custom brushes
- Look for custom brushes online or create your own using a graphic design software like Adobe Photoshop or Procreate. Custom brushes are typically in the form of brush files (e.g., .abr files for Photoshop) or image files (e.g., .PNG files).
Step 2: Import the custom brushes
- Open your design software and navigate to the brush settings or import options.
- Depending on the software, click on "Load Brushes," "Import Brushes," or a similar option.
- Locate the custom brush file (.abr or image file) on your computer and import it into the software.
Step 3: Select and adjust the custom brushes
- Open a new canvas or an existing project where you want to use the custom brushes.
- Go to the brush options/settings in your software and locate the imported custom brushes.
- Click on a custom brush to select it and adjust its properties like size, opacity, flow, or other parameters based on your preference.
- Experiment with different custom brushes to find the one that suits your needs.
Step 4: Use custom brushes on the canvas
- Start drawing or painting on the canvas using the selected custom brush.
- Move your cursor/stylus on the canvas to see how the custom brush affects the strokes or marks.
- Play with different settings, colors, and techniques to create various effects and textures using the custom brushes.
Step 5: Save and export your artwork
- Once you finish creating your artwork, save it in the desired format (e.g., JPEG, PNG, PSD) to preserve the custom brush effects.
- You can also export your artwork for sharing or printing purposes.
Note: The steps mentioned above may vary slightly depending on the graphic design software you are using, so refer to the software's documentation or search for specific tutorials related to importing custom brushes for more precise instructions.
What is the role of layers blending modes in drawing tools?
The role of layers blending modes in drawing tools is to enable the combination of multiple layers of artwork in various ways. Blending modes determine how the colors and tones of different layers interact with each other when they overlap. They allow for various effects such as transparency, overlay, shading, highlights, shadows, and more.
When using drawing tools with layers blending modes, each layer can be set to a specific blending mode that affects how it interacts with the layers below it. For example, if a layer is set to "multiply" blending mode, it will darken the colors beneath it, giving the appearance of shading or shadows. If a layer is set to "screen" blending mode, it will lighten the colors beneath it, creating highlights.
Different blending modes offer a wide range of options for combining and manipulating layers, allowing artists to achieve various visual effects and enhance their artwork. They provide flexibility and creative possibilities in digital drawing tools.