
Best Canvas Drawing Tools to Buy in November 2025
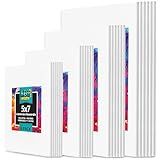
KEFF 24-Pack Canvas for Painting, 6 of 5x7, 8x10, 9x12,11x14 Painting Canvas Boards, Art Supplies for Adults & Kids - 100% Cotton Primed Canvases for Painting for Acrylic, Oil, Watercolor, Tempera
- VERSATILE SIZES: FOUR CANVAS SIZES ENSURE PERFECT FIT FOR ANY PROJECT.
- TRIPLE-PRIMED QUALITY: SMOOTH SURFACES ENHANCE PAINT APPLICATION AND COLOR.
- GIFT-READY SET: IDEAL FOR ARTISTS OF ALL AGES, PERFECT FOR GIFTING!


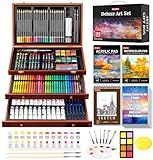
Soucolor Art Supplies, 192-Pack Deluxe Art Set Drawing Painting Supplies Kit with Acrylic Pad, Watercolor Pad, Sketch Book, Canvases, Acrylic Paint, Crayons, Pencils, Gifts for Artist Adults Teen Kids
- ALL-IN-ONE ART KIT: 192 ESSENTIAL SUPPLIES FOR ALL SKILL LEVELS.
- DELUXE WOODEN CASE: NEATLY ORGANIZED FOR EASY ACCESS AND TRAVEL.
- PERFECT GIFT BOX: IDEAL FOR ARTISTS OF ALL AGES-SPARK CREATIVITY!
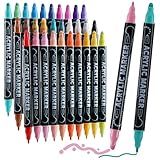
Nauets 30 Colors Waterproof Dual Tip Acrylic Paint Pens, Dot & Fine Tip Premium Coloring Drawing Markers Set for Wood, Rock Painting, Canvas, Glass, Ceramic Surfaces and DIY Crafts Making Art Supplies
-
DUAL-TIP CONVENIENCE: TWO NIB SIZES FOR VERSATILE COLORING NEEDS!
-
EFFORTLESS USE: NO SHAKING REQUIRED-JUST OPEN AND START PAINTING!
-
VIBRANT 30-COLOR SET: PERFECTLY MATCHED CAPS FOR EASY COLOR SELECTION!
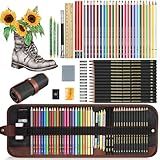
Sketching Drawing Art Pencil Kit-50 Piece Set with 24 Color Pencils for Adult Kid Coloring Books, 14 Graphite 3 Charcoal Erasers Etc., Artist Supplies Ideal for Adult, Kid,Student, Beginner
-
COMPLETE 50-PIECE SET FOR ARTISTS OF ALL SKILL LEVELS AND AGES.
-
PORTABLE CANVAS PACKAGE IDEAL FOR TRAVEL, STUDY, OR OUTDOOR SKETCHING.
-
PERFECT GIFT FOR ART ENTHUSIASTS; GREAT FOR BIRTHDAYS AND HOLIDAYS.
12 Sheets Canvas Paper Pad 9”x12”, 350 GSM Canvas Sheets Glue Bound Canvas Sketchbook for Adults and Students - Acrylic Painting, Oil Painting
- TOUGH CANVAS PAPER (350GSM) ENSURES DURABILITY & LONG-TERM PRESERVATION.
- LIGHTWEIGHT & PORTABLE-PERFECT FOR OUTDOOR SKETCHING & TRAVEL ART!
- VERSATILE FOR VARIOUS MEDIA-IDEAL FOR ACRYLICS, OILS, AND MORE!
Soucolor Acrylic Paint Brushes Set, 20Pcs Round Pointed Tip Artist Paintbrushes for Acrylic Oil Watercolor Canvases Rock Body Face Nail Miniature Detailing Drawing Art Supplies
-
VERSATILE 20-PIECE SET FOR ALL CREATIVE PAINTING NEEDS!
-
DURABLE, SOFT BRISTLES ENSURE LONG-LASTING PERFORMANCE AND QUALITY.
-
PERFECT GIFT FOR ARTISTS, STUDENTS, AND CREATIVE MINDS ALIKE!
To save and load a canvas drawing, you can follow these steps:
- Saving a Canvas Drawing: a. Convert the canvas drawing to an image representation using the toDataURL() method of the canvas object. b. Create an element in your HTML. c. Set the download attribute of the element to specify the filename for the saved image. d. Set the href attribute of the element to the data URL obtained from toDataURL(). e. Trigger a click event on the element programmatically to prompt the user to save the image.
- Loading a Canvas Drawing: a. Create an element of type "file" in your HTML to allow the user to choose a file to load. b. Attach an event listener to the element to listen for changes in the selected file. c. On change event, retrieve the selected file using the files property of the element. d. Create a new FileReader object. e. Set the onload event handler for the FileReader object to handle the file loading process. f. Convert the loaded file to a data URL using the readAsDataURL() method of the FileReader object. g. Set the src attribute of an element to the obtained data URL. h. Draw the loaded image onto the canvas using the drawImage() method of the canvas context.
These are the essential steps to save and load a canvas drawing. However, while implementing this functionality, you may need to consider additional details specific to your web application or usage scenario.
How to prompt the user for a filename when saving a canvas drawing?
To prompt the user for a filename when saving a canvas drawing, you can use the following steps:
- Create a button or any other clickable element to trigger the save functionality.
- Add an event listener to the button to handle the click event.
- Inside the event listener function, use the prompt() function to display a dialog box asking the user to enter a filename. Make sure to store the value entered by the user in a variable.
- Use the variable value to set the filename when saving the canvas drawing.
Here is an example code snippet using JavaScript:
// Assuming you have a button with an id "saveButton" and a canvas with an id "canvas"
const saveButton = document.getElementById('saveButton'); const canvas = document.getElementById('canvas'); const ctx = canvas.getContext('2d');
saveButton.addEventListener('click', () => { const fileName = prompt('Enter a filename:'); if (fileName) { // Set the filename when saving the canvas drawing canvas.toBlob(function(blob) { const a = document.createElement('a'); a.href = URL.createObjectURL(blob); a.download = fileName + '.png'; a.click(); }); } });
In this example, when the user clicks the "Save" button, a prompt dialog will appear asking the user to enter a filename. If the user enters a filename and clicks "OK", the canvas drawing will be saved with that filename appended with ".png".
How to enable the user to export a canvas drawing as a PDF?
To enable the user to export a canvas drawing as a PDF, you can follow these steps:
- Create a canvas element in your HTML file:
- Draw your desired content on the canvas using JavaScript:
const canvas = document.getElementById('myCanvas'); const context = canvas.getContext('2d');
// Draw something on the canvas
- Add a button or any other user interface element to trigger the export action:
Export as PDF
- Implement the exportToPDF function in your JavaScript code to convert the canvas drawing to a PDF:
function exportToPDF() { const canvas = document.getElementById('myCanvas');
// Create a new PDF document const doc = new jsPDF();
// Get the canvas drawing as an image data URL const imgUrl = canvas.toDataURL('image/jpeg', 1.0);
// Add the image to the PDF document doc.addImage(imgUrl, 'JPEG', 10, 10, 200, 0); // Adjust the position and size as needed
// Save the PDF document doc.save('drawing.pdf'); }
In the above code, it uses the jsPDF library to create a new PDF document. It then gets the canvas drawing as an image using the toDataURL method and adds it to the PDF document using the addImage method. Finally, the save method is called to prompt the user to save the PDF file.
Make sure to include the jsPDF library in your HTML file by including the following script tag:
By following these steps, the user will be able to export the canvas drawing as a PDF by clicking the "Export as PDF" button.
What is the process of saving and loading a canvas drawing in web development?
The process of saving and loading a canvas drawing in web development typically involves the following steps:
- Save Drawing: When the user wants to save their canvas drawing, you need to capture the current state of the canvas. This can be done by converting the canvas to an image or saving the drawing data. Image: You can use the toDataURL() method of the canvas element to convert the canvas to an image. This method returns a data URL that represents the current content of the canvas as an image. The data URL can then be saved or sent to the server for storage. Drawing Data: Alternatively, you can save the drawing data itself, which includes information about the drawing elements (e.g., paths, shapes, colors). You can store this data in a JSON format or any other suitable format.
- Store/Transfer the Saved Data: Once you have the saved image or drawing data, you need to store it for future use or transfer it to another platform (e.g., server or another user). You can achieve this in various ways, such as sending the data to a server using AJAX, storing it in a database, or saving it locally using browser storage options like LocalStorage or IndexedDB.
- Load Drawing: To load a saved canvas drawing, you need to retrieve the saved data and restore the canvas to its previous state. Image: If you saved the canvas as an image, you can create a new image element using JavaScript and set the source of the image to the saved data URL. Then, draw this image on the canvas using the drawImage() method. Drawing Data: If you stored the drawing data, you can use JavaScript to parse the data and redraw the drawing elements onto the canvas. Iterate through the saved data, recreate the paths, shapes, and other elements, and apply the necessary styling and colors.
By following these steps, you can enable users to save their canvas drawings, store the data, and load it again later to recreate the drawings.
How to implement a "Share" functionality for canvas drawings?
To implement a "Share" functionality for canvas drawings, you can follow these steps:
- Identify which platforms or channels you want to allow users to share their canvas drawings. This could include social media platforms, email, or messaging apps.
- Generate an image file from the canvas drawing. You can use the toDataURL method of the canvas object to convert the drawing to a base64-encoded image string.
const canvas = document.getElementById('myCanvas'); const imageURI = canvas.toDataURL('image/png'); // Generate PNG image
- Create a share button or UI element that triggers the sharing functionality. This can be a button or an icon.
- Attach an event listener to the share button. When the button is clicked, you can perform the sharing action.
- Implement the sharing action for each platform or channel you want to support. Below are examples for sharing on different platforms: Social Media Platforms: You can use their respective JavaScript APIs or open a new window with a share URL that includes the image and any relevant information. For example, for sharing on Twitter: const shareButton = document.getElementById('shareButton'); shareButton.addEventListener('click', () => { const tweetText = 'Check out my canvas drawing!'; const twitterShareURL = `https://twitter.com/intent/tweet?text=${encodeURIComponent(tweetText)}&url=${encodeURIComponent(imageURI)}`; window.open(twitterShareURL, '_blank', 'width=600,height=400'); }); Email: You can create a mailto link with the image URI as an attachment. When the user clicks the link, it will open their default email client with the image attached. const shareButton = document.getElementById('shareButton'); shareButton.addEventListener('click', () => { const emailSubject = 'Canvas Drawing'; const emailBody = 'Check out my canvas drawing!'; const emailLink = `mailto:?subject=${encodeURIComponent(emailSubject)}&body=${encodeURIComponent(emailBody)}`; window.location.href = emailLink; }); Messaging Apps: You can use deep linking to open the app with a pre-filled message and the image attached. const shareButton = document.getElementById('shareButton'); shareButton.addEventListener('click', () => { const messageText = 'Check out my canvas drawing!'; const appShareURL = `whatsapp://send?text=${encodeURIComponent(messageText)}&attachment=${encodeURIComponent(imageURI)}`; window.location.href = appShareURL; });
- Customize the sharing functionality based on your specific requirements, such as adding additional text, hashtags, or handling success/failure callbacks.
Remember to test the sharing functionality on different devices and platforms to ensure a smooth user experience.
What options should be provided to the user while saving or loading a canvas drawing?
When providing options to the user for saving or loading a canvas drawing, consider the following options:
- Save As: Allows the user to choose a destination folder and specify a filename for saving the canvas drawing as a new file.
- Save: If the canvas drawing has already been saved, this option allows the user to save any changes made to the existing file.
- Load: Enables the user to select a previously saved canvas drawing file to load and edit.
- Import: Provides the option to import graphics or images from other file formats (e.g., PNG, JPEG, SVG) and incorporate them into the canvas drawing.
- Export: Allows the user to export the canvas drawing to different file formats, such as PNG, JPEG, SVG, or PDF.
- Recent Files: Displays a list of the most recently opened or saved canvas drawing files, making it easier for the user to access them.
- Templates: Provides pre-designed canvas templates that the user can choose from, which serve as a starting point for their drawing.
- Auto-Save: Automatic saving feature that periodically saves the canvas drawing to prevent loss of work in case of unexpected system failures or crashes.
- Share: Allows the user to share the canvas drawing directly via email, social media platforms, or cloud storage services.
- Duplicate: Provides the option to make a copy of the canvas drawing file, allowing the user to create variations or backup versions.
- Print: Enables the user to print a hard copy of the canvas drawing directly from the application.
These options may vary depending on the specific canvas drawing application or software being used.
How to enable a user to save multiple versions of a canvas drawing?
To enable a user to save multiple versions of a canvas drawing, you can follow these steps:
- Create an HTML canvas element: Start by creating an HTML canvas element where the user can draw and save their artwork. You can set its width and height as needed, and give it an id for easy referencing.
- Initialize variables: Create variables to store the canvas element, the drawing context, and an array to hold the saved versions of the drawing.
var canvas = document.getElementById("myCanvas"); var ctx = canvas.getContext("2d"); var savedDrawings = [];
- Capture user's drawing: Use JavaScript to capture the user's drawing on the canvas. You can add event listeners to track the mouse movements and draw accordingly.
var isDrawing = false;
canvas.addEventListener("mousedown", startDrawing); canvas.addEventListener("mousemove", draw); canvas.addEventListener("mouseup", finishDrawing); canvas.addEventListener("mouseout", finishDrawing);
function startDrawing(event) { isDrawing = true; var x = event.pageX - canvas.offsetLeft; var y = event.pageY - canvas.offsetTop; ctx.beginPath(); ctx.moveTo(x, y); }
function draw(event) { if (!isDrawing) return; var x = event.pageX - canvas.offsetLeft; var y = event.pageY - canvas.offsetTop; ctx.lineTo(x, y); ctx.stroke(); }
function finishDrawing() { isDrawing = false; }
- Save drawing versions: Allow the user to save their drawing versions by capturing the current state of the canvas (drawing) and adding it to the savedDrawings array.
function saveDrawing() { var dataURL = canvas.toDataURL(); savedDrawings.push(dataURL); }
- Restore and display saved versions: Provide a way for the user to restore and view their saved drawing versions. You can create a list or a gallery of saved drawings and associate a restore function to each item.
function restoreDrawing(index) { var img = new Image(); img.onload = function () { ctx.clearRect(0, 0, canvas.width, canvas.height); ctx.drawImage(img, 0, 0); }; img.src = savedDrawings[index]; }
You can further enhance this functionality by providing options to delete or rename saved versions, or by implementing an undo/redo feature.