Best Animation Art Tools to Buy in November 2025
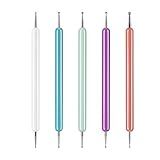
5 Pcs Pattern Tracing Stylus, Ball Embossing Stylus for Transfer Paper, Tracing Tools for Drawing, Embossing Tools for Paper, Art Dotting Tools for Nail Art, Ball Tip Clay Tools Sculpting Stylus
- VERSATILE SET: 10 BALL ENDS IN 5 SIZES FOR ANY CRAFTING NEED!
- DURABLE DESIGN: HIGH-QUALITY STAINLESS STEEL FOR LONG-LASTING USE.
- EASY GRIP: LIGHTWEIGHT & ERGONOMIC FOR COMFORT DURING PRECISION WORK.


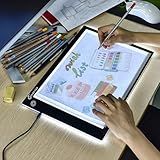
TOHETO A4 Light Board for Diamond Painting, Super Bright Magnetic Light Pad with Side Buttons, Lightbox for Tracing and Drawing, Corded Light Table for Sketching, Animation, Weeding Vinyl (Black)
-
SIDE BUTTONS PREVENT ACCIDENTAL ACTIVATIONS FOR SMOOTH OPERATION.
-
THREE COLOR MODES AND SIX DIMMABLE LEVELS FOR VERSATILE USE.
-
PERFECT FOR ENDLESS PROJECTS; GREAT GIFT AND SATISFACTION GUARANTEED!
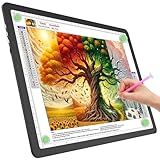
Light Box Drawing Pad, Tracing Board with Type-C Charge Cable and Brightness Adjustable for Artists, AnimationDrawing, Sketching, Animation, X-ray Viewing (A4) Not Rechargeable
-
ADJUSTABLE BRIGHTNESS: 3 MODES FOR PERFECT LIGHTING CONTROL.
-
PREMIUM PMMA MATERIAL: HIGH CLARITY, DURABLE, AND SAFE FOR KIDS.
-
ULTRA-THIN & PORTABLE: LIGHTWEIGHT DESIGN FOR EASY TRANSPORT AND USE.
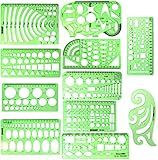
ipxead 11 Piece Geometric Drawing Template Measuring Ruler, Transparent Green Plastic Ruler with Portable Plastic Bag for, for Studying, Designing and Building
-
DURABLE, LIGHTWEIGHT TEMPLATES FOR VERSATILE PATTERN DRAWING.
-
PERFECT FOR STUDENTS, ARTISTS, AND PROFESSIONALS IN ANY FIELD.
-
11-PIECE SET OFFERS EXTENSIVE TOOLS FOR ALL YOUR DRAWING NEEDS.
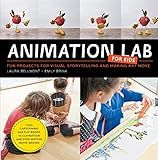
Animation Lab for Kids: Fun Projects for Visual Storytelling and Making Art Move - From cartooning and flip books to claymation and stop-motion movie making
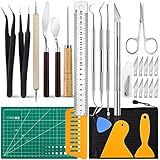
28 PCS Precision Craft Tools Set Vinyl Weeding Tools Kit for Weeding Vinyl, DIY Art Work Cutting, Hobby, Scrapbook
-
COMPLETE CRAFT KIT: 15 ESSENTIAL TOOLS FOR ALL YOUR VINYL PROJECTS!
-
PRECISION & SAFETY: SHARP BLADES WITH SAFETY CAPS FOR SECURE USE.
-
VERSATILE USE: PERFECT FOR DIY, HOBBIES, AND SCRAPBOOKING NEEDS!
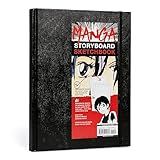
Manga Storyboard Sketchbook: A Comic Book Sketchbook with Storyboard Layout Grids, Acid-Free Medium-Weight Drawing Comic Book Paper
ABenkle 10Pcs Dotting Tools Ball Styluses for Rock Painting, Pottery Clay Modeling Embossing Art Mandala
- PRECISION DOTTING: 20 ENDS & 14 SIZES FOR FLAWLESS ARTISTRY.
- VERSATILE USE: PERFECT FOR ROCKS, CANVAS, CLAY, AND MORE!
- LIGHTWEIGHT DESIGN: EASY TO HANDLE FOR DETAILED PROJECTS.
To put a GIF on a canvas, you can follow these steps:
- First, locate the GIF file that you want to display on canvas.
- Retrieve the HTML element from your webpage using JavaScript. You can do this by assigning an id to your canvas element and then using the getElementById method.
- Load the GIF file using JavaScript by creating a new Image object and setting its src property to the file path of the GIF.
- Once the GIF is loaded, you can access the canvas context using the getContext method. Set the context to 2D or whichever type you plan to use.
- To render the GIF onto the canvas, use the drawImage method of the context. Pass in the loaded Image object as the first argument, and specify the canvas's position where you want to draw the image.
- If needed, you can specify additional parameters like resizing the image while drawing.
- Finally, call the drawImage method within a loop if you want the GIF to be animated. Use the requestAnimationFrame method to create a loop that continuously draws the image on the canvas.
Remember, you may need to consider resizing and positioning the canvas to fit the GIF properly based on your webpage layout and requirements.
What is an HTML canvas element?
The HTML canvas element is an HTML tag that is used to draw graphics, animations, and images on a web page using JavaScript. It provides a structured area on which JavaScript code can create and manipulate graphics. The canvas element is essentially a blank slate that can be dynamically modified and updated to create interactive and visual elements on a webpage. It can be used to create 2D and 3D graphics, games, animations, charts, and other visualizations.
What is JavaScript reverse animation?
JavaScript reverse animation is a technique used to play an animation backwards instead of forwards. Instead of starting from the initial state and transitioning to the final state, the animation starts from the final state and transitions to the initial state. This can be achieved by manipulating the animation properties, such as position, opacity, or scale, using JavaScript code. The reverse animation can create interesting effects and provide a different visual experience for users.
How to loop a gif animation on a canvas using JavaScript?
To loop a GIF animation on a canvas using JavaScript, you can follow these steps:
- Create a canvas element in your HTML file:
- Add JavaScript code to get the canvas element and its context:
var canvas = document.getElementById("myCanvas"); var ctx = canvas.getContext("2d");
- Load the GIF animation using the Image() constructor:
var gif = new Image(); gif.src = "path_to_gif_file.gif";
- To display the first frame of the GIF animation, wait for the image to load, and then draw it on the canvas:
gif.onload = function() { ctx.drawImage(gif, 0, 0); };
- Create a loop function that continuously redraws the GIF animation on the canvas:
function loop() { ctx.clearRect(0, 0, canvas.width, canvas.height); // Clear the canvas ctx.drawImage(gif, 0, 0); // Draw the current frame setTimeout(loop, 100); // Set the loop delay (in milliseconds) }
loop(); // Start the loop
By calling the loop() function, the GIF animation will continuously redraw on the canvas every 100 milliseconds (adjust the delay as needed for your animation).
Note: The GIF animation must be located on the same domain due to security restrictions.
How to resize a gif on a canvas using HTML?
To resize a GIF on a canvas using HTML, you can use the <canvas> element along with JavaScript. Here's an example code snippet to help you get started:
HTML:
JavaScript:
const canvas = document.getElementById('canvas'); const ctx = canvas.getContext('2d');
// Create an image element for the GIF const img = new Image(); img.src = 'your_gif_source.gif';
// Resize the GIF const targetWidth = 300; // Set the desired width const targetHeight = 200; // Set the desired height
img.onload = function() { // Calculate the new width and height based on the target dimensions const ratio = Math.min(targetWidth / img.width, targetHeight / img.height); const newWidth = img.width * ratio; const newHeight = img.height * ratio;
// Draw the resized GIF on the canvas canvas.width = newWidth; canvas.height = newHeight; ctx.drawImage(img, 0, 0, newWidth, newHeight); };
In this example, you need to replace 'your_gif_source.gif' with the actual path or URL of the GIF you want to resize. Adjust the targetWidth and targetHeight variables to the desired dimensions for the resized GIF.
What is HTML border styling?
HTML border styling refers to the manipulation of borders around HTML elements such as paragraphs, divs, tables, and images. It allows you to change the appearance of the borders by altering their color, size, style, and position.
You can specify border styles using CSS (Cascading Style Sheets) by targeting the border properties of an element. The most commonly used border properties include:
- Border color: You can define the color of the border using a color name, RGB value, or hexadecimal code. Example: border-color: red;
- Border width: This property determines the thickness of the border. You can specify it using pixels (px), ems (em), or other units of measurement. Example: border-width: 2px;
- Border style: It signifies the style of the border, such as solid, dotted, dashed, double, etc. Example: border-style: dotted;
- Border radius: This property helps create rounded corners for the border. It accepts values in pixels or percentages. Example: border-radius: 5px;
- Border position: It enables you to define the position of the border around an element, such as inside, outside, or centered. Example: border: 1px solid black;
By combining these properties and values, you can customize the appearance of borders around HTML elements to better suit your design preferences.