
Best CakePHP Hosting Solutions to Buy in October 2025

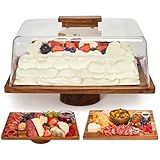
Cake Stand with Lid, Acacia Wood 12in Round Cake Holder, 2-in-1 Dessert Table Display Set & Charcuterie Board for Cheese, Chips & Dips, Nachos, Fruit Platter, Large Acrylic Cake Dome Cover
-
STUNNING RUSTIC ACACIA WOOD ADDS CHARM TO ANY DINING SETTING.
-
UNBREAKABLE ACRYLIC LID KEEPS TREATS FRESH AND VISIBLE.
-
VERSATILE DESIGN PERFECT FOR CAKES, PIES, AND SPECIAL OCCASIONS.


Bellsal Acacia Wood Cake Stand with Lid - 12in Round Cake Holder, 2-in-1 Dessert Table Display Set & Charcuterie Board for Cheese, Chips & Dips, Nachos, Fruit Platter, Large Acrylic Cake Dome Cover
-
ELEGANT ACACIA WOOD: ELEVATE EVENTS WITH A CHIC, SOPHISTICATED CAKE STAND.
-
SHATTERPROOF SAFETY: TRANSPARENT, LIGHTWEIGHT DOME ENSURES SAFETY FOR KIDS.
-
MULTI-FUNCTIONAL DESIGN: VERSATILE AS A CAKE STAND OR CHARCUTERIE BOARD.

HOMESPHERE Acacia Wood Cake Stand with Lid - Rectangular Cake Holder, 2-in-1 Dessert Table Display Set & Charcuterie Board for Cheese, Chips, Fruit Platter, Large Acrylic Cake Dome Cover, No Glass
-
SHOWCASE BAKES BEAUTIFULLY: ELEGANT ACACIA WOOD & DOME LID DESIGN.
-
VERSATILE SERVING: FLIP FOR A CHARCUTERIE BOARD OR FRUIT BOWL!
-
LOCK IN FRESHNESS: KEEPS CAKES MOIST & PASTRIES CRISPY EVERY TIME.

Audab Gold Dessert Table Display Set, Including Cake Stand, Cupcake Stand, Serving trays, Platters, Cake Cutting Set and Serving Tongs for Vintage Wedding Decor, Party Food Decorations
- COMPLETE SET FOR EVERY CELEBRATION: ALL-IN-ONE FOR ANY EVENT'S NEEDS.
- ELEGANT, DURABLE DESIGN: RUST-RESISTANT GOLD FINISH FOR LASTING ELEGANCE.
- VERSATILE USE & EASY CLEANUP: PERFECT FOR DESSERTS AND HASSLE-FREE MAINTENANCE.

Acacia Wood Cake Stand with Lid - 12in Round Cake Holder, 2-in-1 Dessert Table Display Set & Charcuterie Board for Cheese, Chips & Dips, Nachos, Fruit Platter, Large Acrylic Cake Dome Cover
- VERSATILE 2-IN-1 DESIGN: FLIP FOR A STYLISH SERVING PLATTER OR BOARD.
- SAFE DOME LID: CLEAR, LIGHTWEIGHT ACRYLIC-NO GLASS RISKS FOR KIDS!
- PREMIUM QUALITY: DURABLE WOOD AND DEEPENED LIPS FOR LASTING FRESHNESS.

Pack of 10 NWK Cake Stand Set, with 3 x Two-Tier and 3 x Three-Tier Cupcake Stands, 4 x Appetizer Trays, for Birthday Baby Bridal Shower Party (Gold)
-
STURDY DESIGN WITH EXTRA-THICK PLASTIC FOR LASTING USE AND STYLE.
-
LIGHTWEIGHT AND REUSABLE, PERFECT FOR ANY INDOOR OR OUTDOOR EVENT.
-
EFFORTLESS SETUP AND EASY-TO-CLEAN, IDEAL FOR STRESS-FREE CELEBRATIONS!

Acacia Wood Cake Stand with Lid - 15" Rectangular 2-in-1 Serving Board & Dessert Display, Shatterproof Acrylic Cake Dome Cover(5.1" high), Charcuterie Platter for Cheese, Fruit, Appetizers (15 inch)
- TRANSFORMABLE 2-IN-1 DESIGN: CAKE STAND FLIPS TO A CHARCUTERIE BOARD.
- TALL ACRYLIC DOME COVER: SHOWCASES CAKES WITHOUT SQUASHING DECORATIONS.
- PREMIUM ACACIA WOOD: DURABLE, STYLISH, AND EASY-TO-CLEAN CRAFTSMANSHIP!
RosiRoli Acacia Wood Cake Stand with Lid –2-in-1 Rectangular Charcuterie Board & Dessert Display, Shatterproof Acrylic Dome Cover for Freshness, Serving Platter for Parties, Weddings, Birthdays, Gifts
-
ELEGANT 2-IN-1 DESIGN: CAKE STAND FLIPS TO A CHARCUTERIE BOARD-VERSATILE!
-
5-INCH SHATTERPROOF DOME: PROTECTS TALL CAKES WHILE ADDING STYLE TO DISPLAYS.
-
EFFORTLESS CLEAN & STORE: EASY TO CLEAN, LIGHTWEIGHT, AND SPACE-SAVING DESIGN.
To quickly deploy CakePHP on Vultr, follow these steps:
- Sign up for a Vultr account: Go to the Vultr website and sign up for an account. Provide the necessary information and complete the registration process.
- Create a new server: Once you have logged in to your Vultr account, navigate to the Servers tab. Click on the "Deploy New Server" button to start the server creation process.
- Select a server location: Choose a server location that is closest to your target audience or your own location. Vultr provides numerous data centers across the globe. Select the one that suits your requirements the best.
- Choose a server type: Vultr offers various server types depending on your needs. For CakePHP, you can select a server type that supports your desired operating system, such as Ubuntu, CentOS, or Debian.
- Select a server size: Based on your application's requirements, select an appropriate server size. Consider factors like the expected traffic, database storage, and memory requirements.
- Deploy an operating system: Choose an operating system for your server. You can select from popular choices like Ubuntu 20.04, CentOS 8, Debian 10, etc. Ensure that the selected OS is compatible with CakePHP.
- Configure additional options: Vultr provides additional configuration options such as DNS, startup scripts, firewall settings, and more. Configure these options based on your specific needs and requirements.
- Deploy the server: After configuring all the necessary options, click on the "Deploy Now" button to initiate the server creation process. Vultr will now provision and deploy your selected server.
- Connect to the server: Once the server is deployed, Vultr will provide you with the necessary login credentials, including the IP address, username, and password. Use these credentials to connect to your server either via SSH or using a remote desktop client.
- Install and configure CakePHP: Once connected to the server, follow the official CakePHP documentation to install and configure CakePHP in the desired directory. Set up the necessary dependencies, database connections, and configure your application settings according to your requirements.
- Test your CakePHP application: Once the installation and configuration are complete, verify the successful deployment of your CakePHP application by accessing it through a web browser. Test its functionality, make any necessary adjustments, and ensure everything is working as expected.
By following these steps, you can quickly deploy and start using CakePHP on a Vultr server to build your web application.
How to generate a CakePHP project?
To generate a CakePHP project, you need to follow these steps:
- Install Composer: CakePHP uses Composer to manage its dependencies. Make sure you have Composer installed on your system. You can download it from the official Composer website and follow the installation instructions.
- Create a new project: Open your terminal or command prompt and navigate to the directory where you want to create your project. Run the following command: composer create-project --prefer-dist cakephp/app project-name Replace "project-name" with the desired name for your project. This command will download the latest stable version of CakePHP and create a new directory with your project's name.
- Configure the Database: Navigate to the newly created project directory using cd project-name. Open the config/app.php file and look for the 'Datasources' section. Update the 'default' configuration to match your database settings, including the host, port, database name, username, and password.
- Run Migrations: CakePHP provides a command-line tool called Bake, which can be used to generate code and run database migrations. Run the following command in your terminal or command prompt: bin/cake migrations migrate This command will create the necessary database tables based on the migrations defined in your project.
- Start the Development Server: To run your CakePHP project, you need to start the built-in development server. Use the following command: bin/cake server This will start the server, and you can access your CakePHP project by visiting http://localhost:8765 in your web browser.
That's it! You have successfully generated a CakePHP project and can start building your application.
How to create a Vultr account?
To create a Vultr account, follow these steps:
- Go to the Vultr website at www.vultr.com.
- Click on the "Sign Up" button located at the top-right corner of the homepage.
- Fill in the required information in the registration form, including your email address, desired username, password, and captcha code.
- Scroll down and review the Terms of Service and Acceptable Use Policy. If you agree to the terms, check the box to indicate your acceptance.
- Click on the "Create Account" button.
- You will receive a confirmation email from Vultr containing an activation link. Open the email and click on the activation link to verify your account.
- After verifying your account, you will be redirected back to the Vultr website. At this point, you can set up your billing information, deposit funds into your account, and start using Vultr services.
Note: It is important to provide accurate and valid information during the registration process to avoid any issues with your account.
How to optimize the performance of a CakePHP application on Vultr?
To optimize the performance of a CakePHP application on Vultr, you can follow these steps:
- Optimize PHP Settings: Adjust the "memory_limit" setting in the php.ini file to a higher value if needed. Enable opcode caching (e.g., APC, OPcache) to improve PHP execution performance. Set "max_execution_time" and "max_input_time" to appropriate values based on your application's needs.
- Enable Database Caching: Enable CakePHP's built-in database query caching by setting the 'cacheQueries' option to true in your database configuration file. Utilize a caching mechanism like Memcached or Redis to store query results for faster subsequent retrievals. Configure CakePHP to use the caching system.
- Optimize Database Performance: Analyze and optimize database queries using the CakePHP DebugKit or other database profiling tools. Add relevant indexes to database tables to speed up query execution. Optimize table structure and relationships to eliminate unnecessary joins.
- Enable Asset Caching and Compression: Enable CakePHP's asset caching by setting the 'Asset.timestamp' configuration option to 'force' in your core configuration file. Configure your web server (such as Nginx or Apache) to compress static assets (js, css) using techniques like Gzip compression.
- Implement Caching Mechanisms: Utilize full-page caching for static or less frequently changing pages using CakePHP's built-in caching mechanisms. Implement partial caching for dynamic sections of your pages through the use of CakePHP helpers and caching methods.
- Use a Content Delivery Network (CDN): Offload static assets (images, CSS, JS files) to a CDN like Cloudflare to reduce server load and improve global delivery time.
- Optimize Code and Database Connections: Minimize unnecessary code execution and reduce the number of database queries by optimizing the application's logic and queries. Use persistent database connections to reduce connection overhead by setting 'persistent' => true in your database configuration.
- Monitor and Scale: Regularly monitor your application's performance using tools like New Relic or Blackfire. Identify and resolve bottlenecks. Consider scaling horizontally by distributing the load across multiple servers using Vultr's load balancer or by using multiple instances.
It's important to note that each application may have specific requirements, so it's recommended to profile and benchmark your application to identify the areas that need optimization and tailor the approach accordingly.
How to install CakePHP framework?
To install CakePHP framework, follow these steps:
- Make sure you have PHP and Composer installed on your system. If not, you can download and install them from their official websites.
- Open your command-line interface (CLI) or terminal.
- Navigate to the directory where you want to install the CakePHP framework.
- Run the following Composer command to create a new CakePHP project:
composer create-project --prefer-dist cakephp/app project-name
Replace "project-name" with the desired name for your project.
- Wait for the Composer to download and install the necessary files and dependencies for your CakePHP project.
- Once the installation completes, you will see a success message with instructions on how to start the built-in development server.
- Optionally, you may want to configure your database connection by editing the config/app.php file.
That's it! You have successfully installed the CakePHP framework on your system. You can now start building your CakePHP application.
How to monitor performance of a CakePHP application on Vultr?
To monitor the performance of a CakePHP application on Vultr, you can follow these steps:
- Use a tool like New Relic or Datadog to monitor your application's performance. These tools provide detailed insights into the performance of your application, including response time, database queries, and other performance metrics.
- Install the monitoring tool on your Vultr server. Most monitoring tools provide installation instructions specific to your operating system. Follow the instructions to set up the monitoring agent.
- Configure your CakePHP application to send performance data to the monitoring tool. This may involve adding a few lines of code to your CakePHP application to send performance data to the monitoring tool's API.
- Set up alerts to notify you of any performance issues. Monitoring tools usually allow you to set up alerts based on specific thresholds. For example, you can set an alert to trigger when the response time exceeds a certain limit or when the number of database queries exceeds a certain threshold.
- Monitor your application's performance regularly. Check the monitoring tool's dashboard to view real-time performance data and analyze any issues that arise. Identify potential bottlenecks and optimize your code accordingly.
- Use load testing tools to simulate heavy traffic and gauge your application's performance under different loads. This will help you identify any performance bottlenecks and optimize your application for better scalability.
- Continuously monitor your application's performance and make necessary optimizations to improve its speed and efficiency. Regularly review the performance metrics provided by the monitoring tool and take appropriate actions to resolve any performance issues.
By following these steps, you can effectively monitor the performance of your CakePHP application on Vultr and ensure it runs smoothly and efficiently.
What is the latest version of CakePHP?
As of September 2021, the latest stable version of CakePHP is 4.3.2, released on August 28, 2021.